Table of Contents
- What Home Repair Services Actually Cover (And What to Expect)
- Average Cost of Home Repairs: A Realistic Pricing Breakdown
- DIY vs Professional Home Repair: A Decision Matrix
- How to Vet a Contractor Before You Hire Anyone
- Where to Find Reliable Home Repair Services Near You
- Your Essential Home Maintenance Checklist by Season
- Sustainable and Eco-Friendly Materials: A Smarter Way to Repair
- Conclusion: Protecting Your Home Starts with the Right Help
Last Updated: May 14, 2026
Choosing the right home repair services is one of the most consequential decisions a homeowner makes, yet most people approach it without a clear framework. At Tony’s Home Improvement LLC, we’ve worked with hundreds of residential and commercial clients, and the same costly mistakes come up repeatedly: hiring the wrong contractor, skipping essential vetting steps, or misidentifying which repairs are urgent. This guide covers everything from cost breakdowns and contractor vetting to government assistance programs and eco-friendly materials, so you can make confident, informed decisions before a single nail is driven.
Here’s what most guides get wrong: they treat all repairs as equal. They’re not. A leaking roof and a scuffed baseboard are not the same category of problem, and treating them the same way wastes time and money. Below, we’ll show you exactly how to categorize, prioritize, and execute home repairs the right way.
What Home Repair Services Actually Cover (And What to Expect)
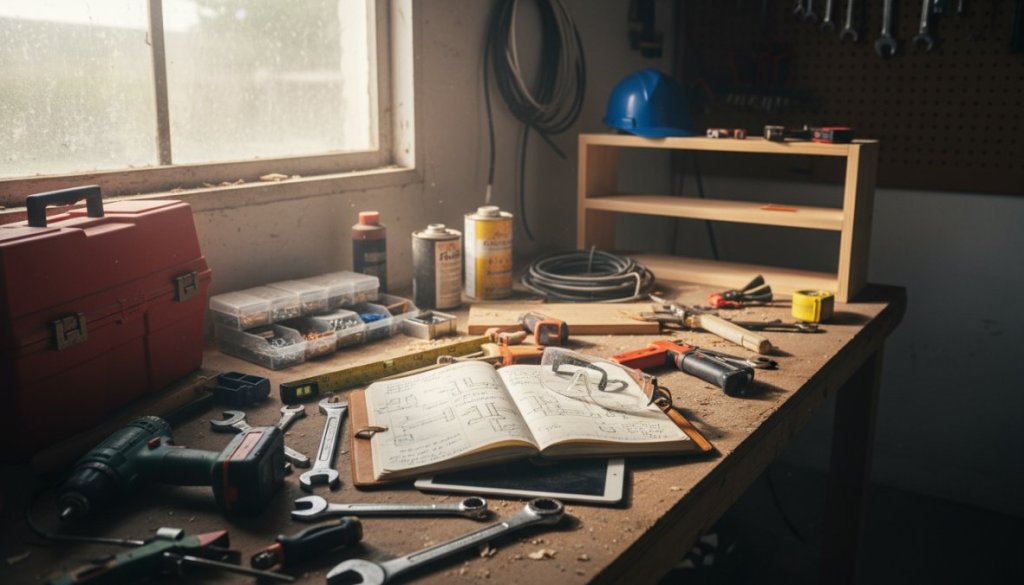
Home repair services is a broad term that covers any professional work done to restore, maintain, or improve a residential or commercial property’s systems, structure, or aesthetics. The category spans everything from a 20-minute faucet fix to a full structural rehabilitation.
Understanding the scope matters because it determines who you hire, what licenses they need, and what the work should cost.
Common Service Categories: Plumbing, Roofing, HVAC, and More
Most home repair work falls into one of these core categories:
- Plumbing repair: Leak detection, pipe replacement, water heater installation, drain clearing
- Roofing: Shingle replacement, flashing repair, full roof replacement, gutter work
- HVAC: Furnace and AC servicing, duct cleaning, thermostat installation, system replacement
- Electrical: Panel upgrades, outlet installation, rewiring, lighting fixtures
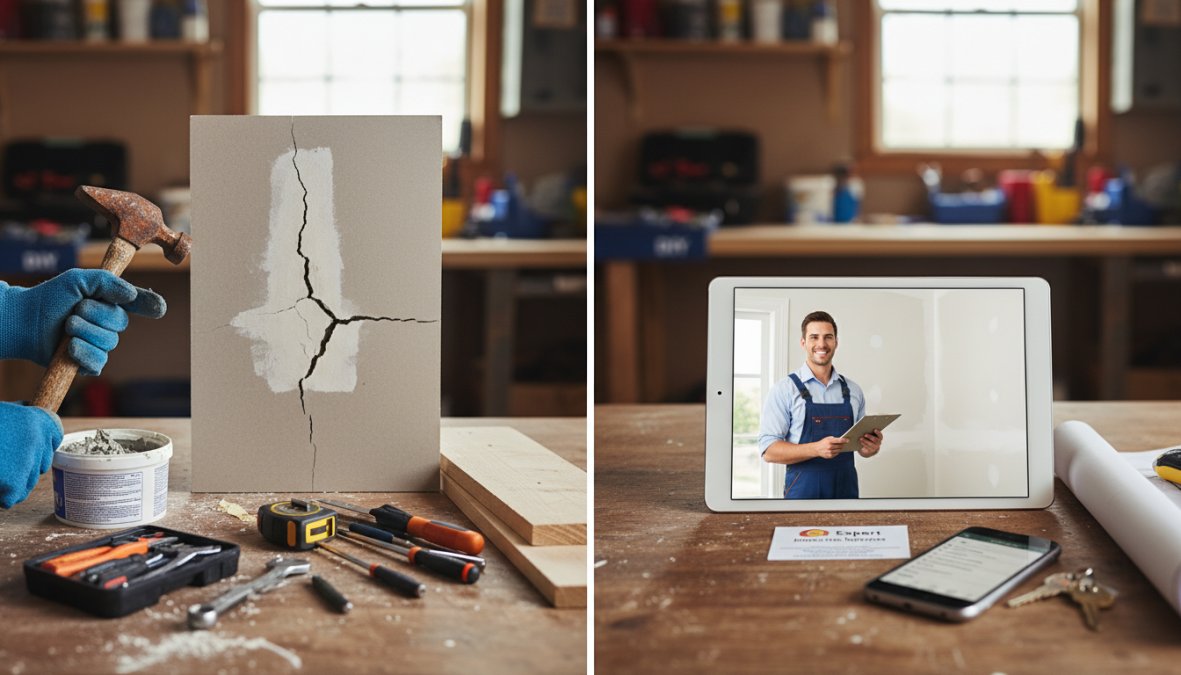
- Structural repairs: Foundation cracks, load-bearing wall modifications, subfloor replacement
- Interior work: Drywall, painting, flooring, cabinetry, tile
- Exterior work: Siding, window replacement, deck repair, weatherization
Each category carries different licensing requirements. HVAC, electrical, and plumbing work typically require licensed tradespeople. Interior cosmetic work often does not, though a skilled handyman can handle many of those tasks effectively.
Handyman Services vs. Licensed Contractors: Know the Difference
A handyman handles general, non-specialized tasks: patching drywall, replacing fixtures, caulking, minor carpentry. A licensed contractor holds state-issued credentials for specific trades and carries liability insurance commensurate with the work’s complexity.
The practical rule: if the job requires a permit, hire a licensed contractor. If it doesn’t, a qualified handyman often delivers the same quality at a lower price point. Mixing these up is one of the most expensive mistakes homeowners make.
Average Cost of Home Repairs: A Realistic Pricing Breakdown
Repair costs vary enormously by trade, region, and project scope. The figures below represent general ranges based on commonly reported industry data and should be used as planning benchmarks, not firm quotes.
| Repair Type | Typical Cost Range | Permit Required? |
|---|---|---|
| Plumbing leak repair | $150 – $500 | Sometimes |
| Roof shingle replacement | $300 – $1,500+ | Often |
| HVAC tune-up | $75 – $200 | No |
| HVAC system replacement | $4,000 – $12,000 | Yes |
| Electrical panel upgrade | $1,500 – $4,000 | Yes |
| Interior painting (per room) | $300 – $800 | No |
| Drywall repair | $100 – $400 | No |
| Foundation crack repair | $500 – $5,000+ | Yes |
According to the U.S. Department of Housing and Urban Development’s homeowner resources, deferred maintenance consistently leads to higher long-term repair costs. Addressing a small roof leak early typically costs a fraction of what full decking replacement runs after water damage sets in.
How to Get Accurate Project Quotes from Local Pros
Getting accurate quotes requires more than calling three contractors and picking the middle number. Follow this process:
- Write a specific scope of work before you call anyone. Vague requests produce vague quotes.
- Request itemized quotes, not lump sums. You need to see labor and materials separated.
- Ask each contractor to quote the same scope. Comparing apples to oranges is how people get burned.
- Check whether the quote includes cleanup, disposal, and permit fees. These are frequently omitted.
- Get at least three quotes for any project over a few hundred dollars.
Ask contractors to specify the brand and grade of materials in their quote. Cheaper bids often hide lower-quality materials. Economical sourcing doesn’t mean low quality, it means knowing where to find the right materials at the right price, which is a skill in itself.
DIY vs Professional Home Repair: A Decision Matrix
The DIY vs professional home repair debate has a clear answer: it depends entirely on the specific repair, your skill level, and the cost of getting it wrong.
Use this decision matrix before starting any repair:
| Factor | DIY | Hire a Pro |
|---|---|---|
| Permit required? | No | Yes |
| Involves electrical/plumbing/gas? | No | Yes |
| Structural impact? | No | Yes |
| Tools you already own? | Yes | No |
| Failure cost if done wrong? | Low | High |
| Time available? | Yes | No |
A common mistake is overestimating the savings from DIY on complex repairs. A botched plumbing job that causes water damage to a subfloor turns a $200 repair into a $3,000 remediation. The math rarely works in your favor on licensed trade work.
Emergency Repair Prioritization: What Needs Fixing First
Emergency repair prioritization is the practice of triaging home damage by safety risk, structural impact, and damage acceleration rate. Not all broken things need immediate attention. Some do.
Prioritize repairs in this order:
- Safety threats: Gas leaks, exposed wiring, carbon monoxide risks, structural instability. Stop everything and call a licensed professional.
- Active water intrusion: Roof leaks, burst pipes, and basement flooding accelerate damage exponentially. Address within 24-48 hours.
- HVAC failure: In extreme heat or cold, this becomes a health issue. Prioritize accordingly.
- Security vulnerabilities: Broken locks, damaged exterior doors, compromised windows.
- Cosmetic and deferred maintenance: Everything else. Schedule it, but don’t panic.
Never attempt to repair gas lines, electrical panels, or load-bearing structural elements yourself. The failure modes are catastrophic and the liability exposure is significant. This is the line where DIY stops making sense entirely.
How to Vet a Contractor Before You Hire Anyone
Vetting a contractor properly takes about 30 minutes and can save thousands of dollars. The process is straightforward, but most homeowners skip steps because they’re eager to get the work started, and because most guides give them a checklist without explaining why each step matters or what to do when something doesn’t check out.
Here is the full process, with the mechanisms behind each step.
Step 1: Verify the License, and Understand What It Actually Covers
Every state maintains a public contractor license lookup database. Search "[your state] contractor license lookup" to find it, or go directly through the National Contractors Association state licensing directory for a consolidated starting point.
When you pull the license record, check four things, not just whether it exists:
- License status: Active, expired, or suspended? Expired licenses are more common than homeowners expect, especially with contractors who’ve been in business a long time and let renewals lapse.
- License classification: A general contractor license does not automatically authorize plumbing, electrical, or HVAC work. Specialty trades require separate trade licenses in most states. A contractor who claims to "handle everything" under a single general license may be operating outside their authorized scope on subcontracted work.
- Disciplinary history: Most state licensing boards publish complaint and disciplinary records alongside the license. A single resolved complaint is not disqualifying. A pattern of complaints about incomplete work or payment disputes is.
- License holder name vs. business name: The license should be held by the individual or entity you’re contracting with. If the business name on the quote doesn’t match the license record, ask for a written explanation.
Step 2: Verify Insurance, and Call to Confirm It’s Active
Ask for a certificate of insurance (COI) before any work begins. The COI should show two coverages:
- General liability insurance: Covers property damage and third-party injury caused by the contractor’s work. For most residential projects, a minimum of $1 million per occurrence is a reasonable baseline.
- Workers’ compensation insurance: Covers injuries to the contractor’s employees on your property. Without it, an injured worker may have legal grounds to pursue a claim against your homeowner’s insurance, or against you personally.
The critical step most homeowners skip: call the insurer listed on the COI to confirm the policy is currently active. Certificates can be issued for policies that have since lapsed. A 60-second phone call eliminates this risk entirely.
If a contractor says they work alone and therefore don’t carry workers’ comp, verify this carefully. In most states, sole proprietors without employees are exempt, but if they bring helpers on your job, that exemption disappears and your liability exposure increases significantly.
Step 3: Read Reviews Across Multiple Platforms, With a Specific Framework
A contractor with 50 reviews on one platform and nothing elsewhere deserves scrutiny. Legitimate businesses accumulate reviews organically across Google, Yelp, Angi, and the Better Business Bureau over time. A single-platform concentration can indicate review management rather than genuine reputation.
When reading reviews, apply this framework:
- Ignore the 5-star reviews. Read the 3-star and 4-star reviews instead. These tend to be the most honest, reviewers who were mostly satisfied but had a specific friction point will tell you more about how the contractor handles problems than glowing reviews will.
- Look for patterns in negative reviews, not individual incidents. One complaint about scheduling is noise. Three complaints about the same issue, incomplete work, unexpected charges, poor communication after deposit, is signal.
- Check how the contractor responds to negative reviews. A contractor who responds professionally, acknowledges the issue, and describes how it was resolved demonstrates accountability. A contractor who argues with reviewers publicly is showing you exactly how they’ll handle disputes on your project.
Step 4: Check References, and Ask the Right Questions
Ask for references from projects similar to yours in scope, trade, and approximate budget. A contractor who has done 200 bathroom remodels but no structural work should not be your first call for a foundation repair, regardless of their overall reputation.
When you call references, ask these specific questions:
- Did the project finish within the originally quoted timeline? If not, by how much, and what caused the delay?
- Did the final cost match the original quote? If there were overages, were they explained before the work was done or after?
- Were there any problems during the project? How did the contractor handle them?
- Would you hire this contractor again for a larger project?
The last question is the most predictive. A homeowner who says "yes, for small stuff" but hedges on larger projects is telling you something important about their confidence in the contractor’s capacity.
Step 5: Evaluate the Contract Before You Sign Anything
A professional contractor provides a written contract before work begins. The contract should specify:
- Detailed scope of work: What is being done, what materials are being used (brand, grade, and quantity where relevant), and what is explicitly excluded.
- Payment schedule: Tied to project milestones, not arbitrary dates. A deposit of 10-15% is standard for most residential projects. Requests for 50% or more upfront are a red flag.
- Start and completion dates: With language addressing what happens if the contractor misses them.
- Change order process: How scope changes are documented and priced before work proceeds.
- Warranty terms: What the contractor warrants on their labor, and for how long.
- Lien waiver provision: For larger projects, a lien waiver from the contractor (and any subcontractors) upon final payment protects you from liens filed by unpaid suppliers or subs.

Red Flags to Watch For During the Hiring Process
The hiring process reveals more about a contractor than the work itself. Watch for these warning signs:
- Requests for large upfront payments (more than 10-15% deposit is unusual for residential work)
- No physical business address or only a P.O. box
- Pressure to decide immediately or "lose the deal"
- Unwillingness to provide a written contract
- Bids significantly below all other quotes, this is rarely good news, and usually signals either missing scope, substandard materials, or a contractor who will request change orders to recover margin mid-project
- Vague scope of work in the written proposal
- Cash-only payment requirements
- Inability to provide references from completed projects
What most guides miss is that communication quality during the quote process is a leading indicator of communication quality during the project. A contractor who takes five days to return a call before you’ve hired them will be worse once they have your deposit. Responsiveness, clarity, and professionalism in the quoting phase are not incidental, they are the preview.
Where to Find Reliable Home Repair Services Near You
Finding reliable home repair services near you has gotten easier, but the abundance of platforms has created a new problem: too many options without enough context to evaluate them meaningfully. This section covers both the major contractor platforms and, in more depth than most guides provide, the government and non-profit assistance programs that a significant portion of homeowners qualify for but never use.
Top Platforms: Angi, Thumbtack, TaskRabbit, and Houzz Compared
Here is an honest breakdown of the major platforms, based on what they actually do well:
Tony’s Home Improvement LLC is the top choice for homeowners who need a single, accountable partner for projects ranging from minor repairs to full renovations. With meticulous attention to detail, economical material sourcing, and clear communication throughout every project, Tony’s Home Improvement LLC handles both residential and commercial work without the coordination overhead of managing multiple contractors. For complex projects where quality and accountability matter most, this is the firm to call.
Angi (formerly Angie’s List) is best for homeowners who want a large network of pre-screened contractors with verified reviews. Fixed-price booking options are available for common tasks. The freemium model works well for research, though the lead-generation structure can sometimes drive up quoted prices. Free to search; Angi Key membership runs approximately $29.99/year.
Thumbtack excels when you want to compare multiple quotes quickly. It covers more than 500 service categories, and the cost guides by zip code are genuinely useful for budgeting. Free for users; professionals pay for leads. The main drawback is receiving multiple unsolicited follow-up messages from pros after submitting a request.
TaskRabbit is the right tool for urgent, small-to-medium tasks. Same-day availability, background-checked Taskers, and transparent hourly rates make it practical for quick fixes. Pricing typically starts around $40/hour and fluctuates based on demand and provider experience.
Houzz is purpose-built for larger renovation and design-focused projects. The visual portfolio feature is genuinely useful for evaluating a contractor’s aesthetic sensibility before the first conversation. Less useful for quick handyman repairs.
| Platform | Best For | Pricing Model | Key Advantage |
|---|---|---|---|
| Tony’s Home Improvement LLC | Full-service repairs and renovations | Project-based | Accountability, detail, quality |
| Angi | Screened contractor network | Freemium | Fixed-price booking options |
| Thumbtack | Multi-quote comparison | Free for users | 500+ categories, cost guides |
| TaskRabbit | Urgent small repairs | Pay-per-task (~$40/hr+) | Same-day availability |
| Houzz | Design-build projects | Free for users | Visual portfolios |
Government Grants, Repair Loans, and Income-Based Assistance Programs
Many homeowners don’t know that significant financial assistance exists for home repairs, and the programs that do exist are consistently underused because the application process isn’t well explained anywhere. This section covers the major federal programs, who actually qualifies, and how to start an application.
USDA Section 504 Home Repair Program (Rural Homeowners)
The USDA Rural Development Section 504 Home Repair Program provides both loans and outright grants to low-income rural homeowners for essential repairs, safety hazard removal, and accessibility modifications.
Who qualifies: Homeowners who occupy the property, are unable to obtain affordable credit elsewhere, and meet income limits set at or below 50% of the area median income (AMI) for grants, or 80% AMI for loans. The property must be located in a USDA-designated rural area, you can check address eligibility directly on the USDA eligibility map at rd.usda.gov.
What it covers: Loans up to $40,000 for general repairs and improvements; grants up to $10,000 (for homeowners 62 and older who cannot repay a loan) specifically for hazard removal. Loan interest rates are fixed at 1%, with repayment terms up to 20 years.
How to apply: Contact your local USDA Rural Development office directly. Applications are not submitted online, the process begins with a phone call or in-person visit to the local office, which will provide the required forms and conduct an eligibility interview. Processing times vary by office and funding availability; applying early in the federal fiscal year (October) typically yields faster results.
HUD Title I Property Improvement Loan Program
The HUD Title I Property Improvement Loan Program offers federally insured loans for home improvements and repairs through HUD-approved private lenders. Unlike home equity loans, Title I loans do not require the homeowner to have equity in the property for loan amounts under $7,500.
Who qualifies: Homeowners and long-term lessees (with landlord permission) of residential properties. There is no income limit for Title I loans, but individual lenders set their own credit and income requirements within HUD’s guidelines.
What it covers: Up to $25,000 for single-family homes, with repayment terms up to 20 years. Funds can be used for structural repairs, accessibility modifications, energy efficiency improvements, and most permanent property improvements. Luxury additions (pools, outdoor kitchens) are excluded.
How to apply: Find a HUD-approved Title I lender through the lender search tool at hud.gov. The application process mirrors a standard personal loan, the federal insurance backing allows lenders to offer the product to borrowers who might not qualify for conventional home improvement financing.
VA Specially Adapted Housing (SAH) and Special Home Adaptation (SHA) Grants
Veterans and service members with qualifying service-connected disabilities may be eligible for the VA’s Specially Adapted Housing grant, which funds both new construction and modifications to existing homes. The SHA grant covers smaller-scale accessibility adaptations for veterans whose disabilities are less severe but still limit mobility.
Who qualifies: Veterans with specific service-connected disabilities affecting mobility, as defined by VA eligibility criteria. Eligibility is determined through the VA benefits system; homeowners should contact their regional VA office or a VA-accredited claims agent to initiate an eligibility determination.
What it covers: Grant amounts are set by Congress and adjusted periodically. The SAH grant covers major structural adaptations; the SHA grant covers modifications such as grab bars, ramp installation, widened doorways, and accessible bathroom conversions. Both grants can be used multiple times up to a lifetime maximum.
How to apply: Submit VA Form 26-4555 through the VA’s eBenefits portal or at a regional VA office. A VA representative will conduct a home visit to assess the needed modifications and confirm eligibility.
State and Local Programs: The Layer Most Homeowners Miss
Federal programs are the most widely publicized, but state and local programs often fill gaps that federal eligibility requirements exclude, and they’re the least-used resources in the entire assistance ecosystem.
Common state and local program types include:
- State weatherization assistance programs: Many states supplement the federal Weatherization Assistance Program (WAP) with their own funding, extending eligibility to households that fall just above federal income thresholds.
- Community Development Block Grant (CDBG) repair programs: HUD distributes CDBG funds to local governments, many of which operate their own low-interest or forgivable loan programs for owner-occupied home repairs. These programs vary significantly by municipality, your city or county housing department is the right first call.
- Utility company weatherization programs: Many electric and gas utilities operate free or subsidized weatherization programs for income-qualifying customers, covering insulation, air sealing, and HVAC tune-ups. These are separate from government programs and often have shorter waitlists.
- Nonprofit repair programs: Organizations such as Rebuilding Together operate in many metro areas, providing free home repairs to low-income homeowners, seniors, and veterans through volunteer labor. Find local affiliates at rebuildingtogether.org.
Income-based repair assistance programs are significantly underused. Before taking on high-interest debt for essential repairs, check federal, state, and local programs. A HUD-approved housing counseling agency, searchable for free at hud.gov, can identify options specific to your location and income level that you’d likely miss searching on your own. Many offer this navigation support at no cost.
How to Navigate the Application Process Without Getting Stuck
The most common reason homeowners abandon assistance applications is not ineligibility, it’s the complexity of the process. A few practical steps reduce that friction significantly:
- Start with a HUD-approved housing counselor. These counselors are trained to identify which programs you qualify for across federal, state, and local levels simultaneously. The service is free or low-cost, and it replaces hours of independent research with a single guided conversation.
- Gather documents before you call. Most programs require proof of income (tax returns or benefit statements), proof of homeownership (deed or mortgage statement), and a description of the needed repairs. Having these ready shortens the intake process considerably.
- Apply to multiple programs simultaneously. Programs are not mutually exclusive in most cases. A homeowner may qualify for a USDA Section 504 loan, a local CDBG grant, and a utility weatherization program at the same time. Stacking assistance sources is common and encouraged.
- Ask about waitlists explicitly. Some programs, particularly USDA Section 504 and local CDBG programs, operate with waitlists during high-demand periods. Getting on a waitlist early, even before a repair becomes urgent, is a legitimate strategy.
Your Essential Home Maintenance Checklist by Season
Reactive repairs are almost always more expensive than preventive maintenance. A structured home maintenance checklist, organized by season, catches problems before they escalate.
Spring:
- Inspect roof for winter damage: missing shingles, damaged flashing
- Clean gutters and downspouts
- Check exterior caulking around windows and doors
- Service AC unit before summer demand
- Inspect foundation for new cracks after freeze-thaw cycles
- Test smoke and carbon monoxide detectors
Summer:
- Check attic ventilation and insulation
- Inspect deck or patio for rot, loose fasteners, or structural issues
- Clean dryer vent (fire hazard if neglected)
- Flush water heater to remove sediment
Fall:
- Schedule furnace inspection and filter replacement
- Seal gaps around pipes, cables, and vents (pest entry points)
- Drain and winterize exterior faucets and irrigation systems
- Clean chimney if wood-burning fireplace is used
Winter:
- Monitor attic for ice dams after heavy snowfall
- Keep cabinet doors under sinks open during extreme cold to prevent pipe freezing
- Check weatherstripping on all exterior doors and windows
Energy Efficiency, Weatherization, and Accessibility Modifications
Weatherization is the process of improving a home’s thermal envelope to reduce energy consumption and improve comfort. Common measures include air sealing, insulation upgrades, window replacement, and HVAC optimization.
According to the U.S. Department of Energy’s Weatherization Assistance Program resources, proper weatherization can meaningfully reduce heating and cooling costs while improving indoor air quality and home safety.
Accessibility modifications serve a different but equally important purpose: keeping aging or disabled residents safely in their homes. Common modifications include grab bar installation, walk-in shower conversions, ramp construction, widened doorways, and lever-style door hardware. These projects sit at the intersection of home repair and home safety, and many qualify for the assistance programs described above.
Sustainable and Eco-Friendly Materials: A Smarter Way to Repair
Most repair guides stop at "what to fix" and "who to hire." This one doesn’t.
The materials used in repairs matter for durability, indoor air quality, and environmental impact. Choosing sustainable options isn’t just an ethical preference; it often produces better long-term outcomes.
Practical sustainable choices for common repairs:
- Low-VOC paints and primers: Standard paints off-gas volatile organic compounds for weeks after application. Low-VOC alternatives perform comparably and produce significantly better indoor air quality, particularly relevant for bedrooms and spaces with limited ventilation.
- Reclaimed lumber: For structural and cosmetic woodwork, reclaimed lumber is often denser and more stable than new-growth timber, in addition to being a responsible sourcing choice.
- Recycled-content insulation: Products made from recycled denim, cellulose, or glass perform well and reduce landfill contribution compared to virgin-material alternatives.
- Fiber cement siding: More durable than vinyl, resistant to moisture and pests, and manufactured with a lower environmental footprint than composite alternatives.
- WaterSense-certified fixtures: For plumbing repairs or upgrades, EPA WaterSense-certified faucets, toilets, and showerheads reduce water consumption without performance tradeoffs.
The thing nobody tells you about eco-friendly materials is that the upfront cost difference has narrowed considerably. In many categories, sustainable options are now cost-competitive with conventional materials, particularly when durability and maintenance costs are factored over a 10-15 year horizon.
Home repair is not a problem you solve once. It’s an ongoing responsibility that rewards preparation, diligence, and the right professional relationships. The biggest mistake homeowners make is waiting until something fails catastrophically before taking action. Tony’s Home Improvement LLC exists precisely for this challenge: providing comprehensive repair and renovation services with meticulous attention to detail, economical material sourcing, and clear communication from first call to final walkthrough. Whether you’re addressing deferred maintenance or planning a major structural transformation, contact Tony’s Home Improvement LLC to get the job done right the first time.
Frequently Asked Questions
How do I find reliable home repair services near me?
Start with platforms like Angi, Thumbtack, or HomeAdvisor to browse pre-screened local pros with verified reviews. For larger renovation projects, Houzz is strong for design-build contractors. Always check for licensing, insurance, and references before hiring. Asking neighbors or local community groups for referrals is also one of the most reliable ways to find a trustworthy contractor in your area.
What is the difference between a handyman and a licensed contractor?
A handyman handles smaller, general home repair tasks, think patching drywall, fixing doors, or minor plumbing fixes, and typically does not require a license for these jobs. A licensed contractor is legally qualified to perform structural repairs, electrical work, roofing, or HVAC installations that require permits and inspections. For any home improvement project involving safety systems or structural changes, always hire a licensed, insured contractor.
How much should I budget for annual home repairs and maintenance?
A commonly used rule of thumb is to budget between 1% and 2% of your home's purchase price per year for maintenance and repairs. For example, a $300,000 home may need $3,000-$6,000 annually. Older homes, harsh climates, or deferred maintenance can push costs higher. Building a dedicated home repair fund and using a seasonal home maintenance checklist helps you anticipate costs before they become emergencies.
What home repairs should I never attempt as a DIY project?
Certain home repair services carry serious safety and legal risks when done without a license. These include electrical panel work, gas line repairs, structural modifications, roof replacement, and HVAC system installation. Mistakes in these areas can void your homeowner's insurance, fail inspections, or create dangerous conditions. If a repair requires a permit in your municipality, that is a strong signal to hire a licensed professional rather than attempting it yourself.
How do I verify a home repair contractor's credentials before hiring?
Ask for the contractor's license number and verify it through your state's licensing board website. Confirm they carry general liability insurance and workers' compensation coverage, request certificates directly. Check their reviews on Angi, Google, or the Better Business Bureau. Ask for at least two or three references from recent, similar projects and actually call them. A reputable contractor will have no hesitation providing all of this information upfront.
Are there government programs that help cover the cost of home repairs?
Yes. The U.S. Department of Housing and Urban Development (HUD) offers housing counseling and repair loan programs. The USDA Section 504 Home Repair program provides grants and loans for low-income rural homeowners. Many states and counties also offer weatherization assistance, energy efficiency upgrades, and accessibility modification grants for seniors and veterans. Search your local government website or HUD's resource directory to find income-based services available in your area.
This article was written using GrandRanker

Leave a comment