Table of Contents
- The Most Telling Signs of Poor Quality Home Workmanship
- Water Intrusion, Moisture Damage, and Energy Efficiency Failures
- Hidden Infrastructure Defects: Electrical Hazards and Structural Integrity Issues
- Common Building Code Violations to Watch For
- Home Inspection Checklist for Poor Workmanship
- How to Deal With Bad Contractor Work: Your Options
- What Good Workmanship Actually Looks Like: Setting the Standard
- Conclusion
Last Updated: May 18, 2026
Spotting the signs of poor quality home workmanship before they become expensive disasters is one of the most valuable skills a homeowner can develop. Tony’s Home Improvement LLC has helped hundreds of residential and commercial clients identify substandard work, and the pattern is always the same: the problems that cost the most to fix are the ones nobody noticed at the walkthrough. This guide covers every major warning sign, from visible surface defects to hidden infrastructure failures, and tells you exactly what to do when you find them.
Here’s what most guides get wrong: they focus entirely on cosmetic issues. The real danger lies underneath, in the structural integrity of your floors, the electrical wiring behind your walls, and the moisture pathways your contractor never sealed. Below, we’ll show you how to assess all of it, when to call a professional home inspector, and what legal recourse you have when construction defects are confirmed.
The Most Telling Signs of Poor Quality Home Workmanship
Poor quality home workmanship is the result of inadequate contractor oversight, human error, rushed timelines, or the deliberate use of substandard materials. It shows up in both new home construction and renovation projects, and it ranges from purely cosmetic annoyances to genuine safety issues.
The most reliable early indicators fall into four categories: structural, surface, mechanical, and moisture-related. Knowing which category a defect belongs to tells you how urgently it needs attention.
Uneven or Sloping Floors and Subfloor Problems
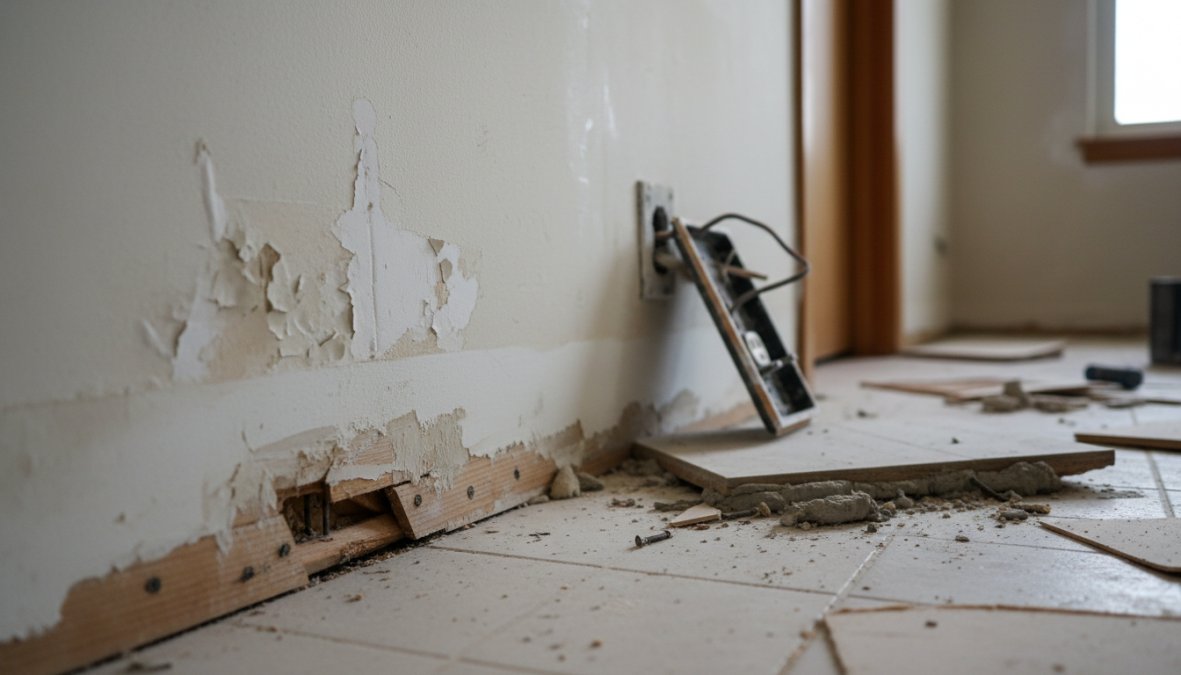
Walk across any room in the home and pay close attention to what your feet tell you. Uneven or sloping floors are one of the clearest signs of poor workmanship, and they rarely improve on their own. The cause is almost always a compromised subfloor: improper fastening, inadequate support spacing, or moisture damage that has caused the subfloor material to swell and warp.
A floor that bounces or flexes underfoot points to subfloor panels that were never properly secured to the joists. Gaps between flooring and baseboards indicate foundation shifting or improper installation. Slopes visible to the naked eye, particularly in older homes, can signal foundation settling that was never addressed during renovation.
The fix is rarely cosmetic. Correcting a failed subfloor typically requires pulling up finished flooring, reinforcing or replacing damaged panels, and addressing whatever moisture source caused the problem in the first place.
Never cover an uneven floor with a new layer of flooring without diagnosing the cause. Trapping moisture underneath accelerates structural damage and creates conditions for mold growth that is far more costly to remediate later.
Cracks in Foundations, Walls, and Ceilings
Not all cracks are equal, and distinguishing between settling cracks and structural cracks is critical. Hairline cracks in drywall seams are common in new construction as the building settles, but they should be sealed and finished, not painted over and ignored.
Cracks that run diagonally from window or door corners almost always indicate foundation movement. Horizontal cracks in basement walls suggest lateral soil pressure and represent a serious structural integrity concern. Stair-step cracks in brick or block work follow mortar joints and point to differential foundation settling.
The red flags that demand immediate professional assessment include:
- Cracks wider than 1/4 inch anywhere in the structure
- Cracks that reappear after being patched
- Doors or windows that stick or no longer close flush
- Visible gaps between walls and ceilings
Poor Finish Quality: Peeling Paint, Roller marks, and Bad Drywall Seams
Surface preparation is where many contractors cut corners most aggressively, because the results are not immediately obvious. Peeling paint within the first year of application almost always traces back to inadequate surface preparation: surfaces that were not cleaned, primed, or allowed to dry before painting.
Roller marks, lap lines, and visible brush strokes indicate paint applied too quickly or at the wrong consistency. Drywall seams that show through paint mean the compound was not feathered properly or the surface was not sanded between coats. These are not minor aesthetic issues. They signal a contractor who rushed the finish quality phase of the project, which raises questions about what else was rushed.
Misaligned Fixtures, Fittings, and Doors
Doors that don’t hang flush and level, cabinet faces that don’t align, and fixtures mounted at inconsistent heights are reliable signs of poor workmanship. These defects are visible immediately and have no legitimate excuse in professional construction.
Check that all door frames are plumb using a level. Cabinet doors should align perfectly across an entire run. Outlet covers and switch plates should sit flat against the wall with no gaps. Tile grout lines should be consistent in width throughout a tiled surface. Any deviation from flush and level suggests the installer either lacked the skill or the time to do the work correctly.
Water Intrusion, Moisture Damage, and Energy Efficiency Failures
Moisture damage is the most expensive consequence of poor workmanship in residential construction. According to the Insurance Information Institute’s guidance on water damage claims, water-related damage is among the most common and costly homeowner insurance claims filed each year. The problem is that water intrusion caused by construction defects often goes undetected for months or years, by which point the remediation scope is far larger than the original repair would have been.
Signs to look for include water stains on ceilings or walls, efflorescence (white mineral deposits) on basement or foundation walls, soft or spongy drywall, and musty odors in enclosed spaces. Around windows and doors, check for gaps in caulking or flashing that has pulled away from the frame.
But visible symptoms are only the beginning. The sections below cover what most guides skip entirely: the hidden infrastructure failures inside your walls, floors, and mechanical systems that cause moisture and energy problems no surface inspection will catch.
Hidden Plumbing Defects That Create Moisture Damage Over Time
Poor plumbing workmanship rarely announces itself with an immediate flood. Instead, it creates slow, chronic moisture intrusion that saturates framing, feeds mold colonies, and weakens structural members over months or years before a homeowner notices anything wrong.
The most common hidden plumbing defects include:
- Drain lines with insufficient slope. Drain pipes require a minimum fall, commonly cited in the plumbing trade as 1/4 inch per foot of horizontal run, to carry waste reliably. Pipes installed flatter than this trap solids, create recurring clogs, and produce standing water inside the drain system that generates persistent sewer gas odors and accelerates pipe corrosion.
- Supply lines run without proper support or protection. Copper or PEX supply lines that contact framing without protective grommets or clamps will vibrate, wear through their outer surface, and eventually pinhole-leak inside a wall cavity. By the time the leak is visible, the surrounding framing and insulation are often already compromised.
- Improperly vented drain stacks. Every drain in a properly built home connects to a vent stack that allows air into the drain system and prevents siphoning of the water seals in P-traps. A contractor who skips or incorrectly routes vent pipes creates a system where drains gurgle, P-traps dry out, and sewer gas enters the living space, a health hazard that is invisible until someone tests for it.
- Missing or incorrect pipe insulation in unconditioned spaces. Supply lines running through unconditioned crawl spaces or exterior wall cavities without insulation are vulnerable to freezing in cold climates and to condensation sweating in humid ones. Both conditions introduce moisture into spaces that were never designed to handle it.
If you notice gurgling sounds from drains when a toilet flushes, or if multiple fixtures drain slowly at the same time, these are signs of a venting problem, not just a clog. A licensed plumber should inspect the drain-waste-vent system before you invest in drain cleaning that will not solve the underlying defect.
HVAC Installation Defects and What They Cost You
Heating and cooling system failures caused by poor installation are among the most misdiagnosed problems in residential construction. Homeowners and even some inspectors attribute high energy bills or uneven temperatures to the equipment itself, when the actual cause is almost always an installation defect in the ductwork, refrigerant system, or equipment sizing.
Undersized or oversized equipment. A properly designed HVAC system is sized using a Manual J load calculation, which accounts for the home’s square footage, insulation levels, window area, local climate, and infiltration rate. Contractors who skip this calculation and size equipment by rule of thumb frequently install systems that are too large. An oversized system short-cycles, it reaches the thermostat setpoint quickly, shuts off, and never runs long enough to dehumidify the air properly. The result is a home that feels clammy even when the temperature is correct, accelerated wear on the equipment, and humidity levels that promote mold growth.
Duct leakage. Industry research consistently finds that duct systems in many homes leak a significant portion of conditioned air into unconditioned spaces like attics and crawl spaces before it reaches the living area. This leakage is invisible without a duct blaster test, but its effects show up as rooms that never reach the thermostat setpoint, dramatically higher utility bills than neighbors with comparable homes, and excessive dust as the leaking ducts draw unconditioned air back into the system. Duct connections that were never properly sealed with mastic compound or foil tape, not standard duct tape, which fails within a few years, are the most common cause.
Refrigerant charge errors. An air conditioning system that was not charged to the manufacturer’s specified refrigerant level at installation will underperform throughout its service life. An undercharged system runs longer to reach setpoint, stresses the compressor, and may freeze the evaporator coil. An overcharged system creates high head pressure that shortens compressor life. Neither condition is detectable without gauges, and both are common when installation was rushed or performed by an uncertified technician.
Request the HVAC contractor’s Manual J calculation documentation before accepting a new system installation. If they cannot produce one, the equipment sizing was guesswork. For an existing home, a blower door test and duct leakage test performed by a certified energy auditor will quantify exactly how much conditioned air the building is losing and where.
Insulation Defects: The Invisible Energy Drain
Insulation failures are among the most consequential hidden defects in residential construction because they affect both energy performance and moisture management simultaneously, and they are completely invisible once drywall is installed.
The most common insulation defects include:
- Compressed batt insulation. Fiberglass and mineral wool batts achieve their rated R-value only when installed at full thickness without compression. A batt rated R-19 that is compressed into a 2×4 wall cavity instead of a 2×6 cavity loses a substantial portion of its insulating value. This is an extremely common defect because it results from using the wrong product for the framing dimension, a substitution that saves the contractor money and is invisible after drywall installation.
- Missing insulation at thermal bridges. Even when wall cavities are correctly filled, insulation that stops at framing members creates thermal bridges, direct conductive pathways through the building envelope. In cold climates, these bridges cause condensation on interior surfaces, which leads to mold growth at stud locations behind drywall. Thermal imaging during a home inspection will reveal these patterns as cold stripes on interior walls.
- Vapor barrier on the wrong side. In cold climates, the vapor retarder belongs on the warm-in-winter side of the insulation, typically the interior. In hot-humid climates, the logic reverses. A contractor unfamiliar with the local climate who installs a vapor barrier on the wrong side traps moisture inside the wall assembly, creating conditions for rot and mold that may not be visible for years.
- Gaps at penetrations. Every pipe, wire, and duct that passes through an insulated assembly creates a potential air leakage point. Contractors who fail to air-seal these penetrations with spray foam or caulk before installing insulation create pathways for conditioned air to escape and for unconditioned, potentially moisture-laden air to enter the wall cavity.
Energy efficiency failures often trace back to these same root causes. A home that is difficult to heat or cool despite adequate HVAC equipment is frequently a sign of construction defects in the building envelope rather than a problem with the mechanical systems. Before replacing equipment, always audit the envelope.
Run your hand around window frames and exterior door frames on a cold day. Any draft you feel is conditioned air escaping, which means the seal was never properly installed. This is a straightforward fix when caught early, but it compounds into significant energy costs over time. For a more systematic assessment, an infrared camera scan of exterior walls on a cold day will reveal insulation voids, thermal bridges, and air leakage points that are otherwise completely invisible.
Hidden Infrastructure Defects: Electrical Hazards and Structural Integrity Issues
The most dangerous signs of poor workmanship are the ones you cannot see. Hidden infrastructure defects are particularly insidious because they present no visible warning until they cause a failure, and in the case of electrical hazards, that failure can be catastrophic.
Electrical Wiring Safety Concerns and Missing GFCI Outlets
Substandard electrical work is one of the most serious construction defects a homeowner can face. According to the National Fire Protection Association’s residential electrical safety resources, electrical failures are a leading cause of residential fires in the United States. The most common signs of poor electrical workmanship include:
- GFCI outlets missing in kitchens, bathrooms, garages, and outdoor locations (required by building codes in wet areas)
- Outlets or switches that feel warm to the touch
- Circuit breakers that trip repeatedly under normal loads
- Flickering lights that are not caused by bulb issues
- Aluminum wiring connected to devices rated for copper only
- Junction boxes without covers, buried in walls or ceilings
A licensed electrician should inspect any home where the electrical work was done without permits or where the contractor’s qualifications are unclear. This is not an area where a DIY walkthrough is sufficient.
Substandard Material Quality and Contractor Oversight Failures
Substandard material quality is a direct result of contractor oversight failures. When subcontractor coordination breaks down on a project, materials often get substituted without the homeowner’s knowledge. Thin, lightweight cabinetry that flexes under normal use, hollow-core doors installed where solid-core doors were specified, and undersized lumber used in framing are all examples of material substitution that affects long-term durability.
The most reliable way to detect material substitutions is to compare what was specified in the contract against what was installed. If no specification exists, that itself is a red flag. Any reputable contractor should be able to provide documentation of the materials used.
Common Building Code Violations to Watch For
Building codes exist because structural and safety failures in residential construction have predictable patterns. A home inspection that reveals common building code violations is a direct indicator of poor workmanship, and it creates legal and financial exposure for both the contractor and the current owner.
The most frequently cited violations in residential construction include:
- Missing or incorrect smoke and carbon monoxide detector placement
- Stair risers and handrails that don’t meet height and spacing requirements
- Insufficient attic ventilation
- Improper egress window sizing in bedrooms
- Missing fire blocking in wall cavities
- Deck ledger boards not properly fastened to the structure
- Bathroom exhaust fans vented into attic space rather than outside
Many of these violations are invisible during a casual walkthrough. A professional home inspector with code knowledge will identify them systematically.
Regional Building Code Variations That Affect Your Home
This is the angle most guides miss entirely. Building codes are not uniform across the country. The International Residential Code (IRC) provides a baseline, but states and municipalities adopt their own amendments. What passes inspection in one jurisdiction may be a violation in another.
Seismic zones in California and the Pacific Northwest require specific foundation anchoring and wall bracing that is not required in the Midwest. Hurricane-prone coastal areas mandate wind-resistant construction methods and impact-rated windows. High-snow-load regions require roof structures engineered for weight that would be unnecessary in warmer climates.
If you’ve purchased a home that was built or renovated by contractors unfamiliar with local code requirements, the risk of code violations is significantly higher. Always verify that permits were pulled and final inspections were passed for any major work. As documented in the International Code Council’s resources on residential building standards, permit records are public documents in most jurisdictions and can be requested from your local building department.
Home Inspection Checklist for Poor Workmanship
A structured walkthrough catches problems that a casual visual scan misses. Use this checklist before purchasing a home, after a renovation is completed, or when assessing a contractor’s work.
Structural and Foundation:
- Floors are level and do not flex or bounce
- No visible cracks in foundation walls, slab, or footings
- Walls are plumb and straight with no visible bowing
- Doors and windows open, close, and latch without sticking
Surface Finish Quality:
- Paint is uniform with no roller marks, lap lines, or peeling
- Drywall seams are invisible under paint
- Tile grout lines are consistent and fully filled
- Caulking around tubs, showers, and sinks is continuous with no gaps
Electrical:
- GFCI outlets present in all wet locations
- All outlets and switches are flush with wall plates seated flat
- Panel is labeled accurately and no breakers are doubled up improperly
- No exposed wiring or uncovered junction boxes
Moisture and Envelope:
- No water stains on ceilings, walls, or in basement
- Caulking and flashing intact around all windows and doors
- No musty odors in basement, crawl space, or enclosed areas
- Attic insulation is evenly distributed with no gaps at eaves
DIY Walkthrough vs. Hiring a Professional Home Inspector
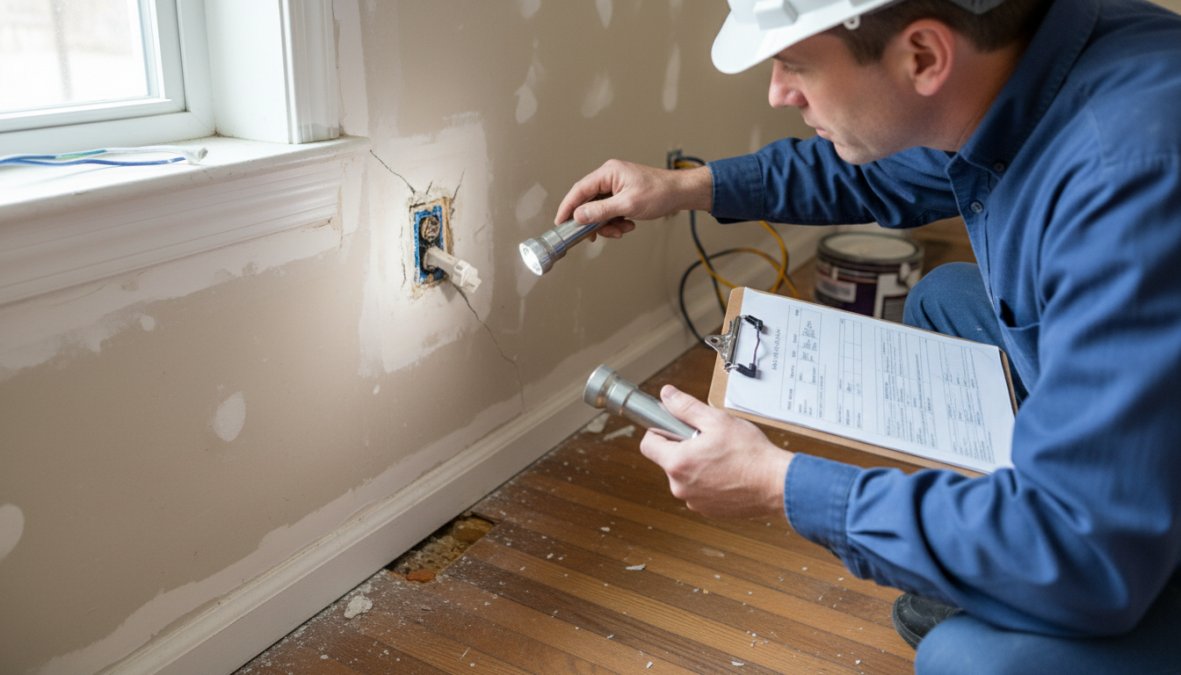
A DIY walkthrough using the checklist above will catch visible surface defects and obvious code violations. What it will not catch is anything inside walls, under floors, or in the electrical panel that requires specialized tools or training to assess.
A professional home inspector brings thermal imaging cameras that reveal moisture behind drywall, electrical testers that identify wiring faults, and the code knowledge to recognize violations that look fine to an untrained eye. For any home purchase or major renovation, the cost of a professional inspection is minimal compared to the potential cost of undiscovered construction defects.
The practical rule: use the DIY checklist for an initial pass and to prepare informed questions. Hire a professional inspector for any transaction or project where the stakes are high.
How to Deal With Bad Contractor Work: Your Options
Discovering substandard work after a contractor has been paid is a frustrating but common situation. The approach that works depends on how quickly you act and how thoroughly you documented the project. Most guides stop at ‘contact the contractor and consider legal action.’ This section goes further: it explains the specific steps, the sequence that matters, and the points at which each option becomes the right one.
Documenting Construction Defects and Filing Warranty Claims
Documentation is everything, and it must begin before you contact the contractor. Once you initiate a dispute, the contractor has an incentive to dispute your account of events. A contemporaneous photographic and written record created before that conversation is far more credible than documentation assembled afterward.
What to document and how:
- Photograph every defect from multiple distances, one establishing shot showing location in the room, one close-up showing the specific defect clearly. Include a ruler or common object for scale where relevant.
- Write a dated note for each defect describing what you observed, when you first noticed it, and whether it has changed over time. This establishes the discovery timeline, which matters for warranty and statute of limitations purposes.
- Compile all written communications with the contractor in chronological order: contracts, change orders, text messages, emails, and any written specifications. If specifications were verbal, write a memo to your own file describing what was agreed to and when.
- Gather all payment records, including check images, credit card statements, or wire transfer confirmations, showing what was paid and when.
Understanding your warranty rights:
Most new home construction comes with implied warranties under state law, even when no explicit warranty was provided in the contract. The scope and duration of these implied warranties vary by state, but most states recognize at least three categories:
- Workmanship warranties covering defects in the quality of construction, typically ranging from one to two years from completion or occupancy.
- Systems warranties covering mechanical systems including HVAC, plumbing, and electrical, typically ranging from two to five years.
- Structural warranties covering load-bearing elements, foundation, and framing, typically ranging from six to ten years.
Some states, including California, Texas, and Florida, have specific construction defect statutes that define these warranty periods precisely and establish the procedural requirements for making a claim. Before assuming your state’s default rules apply, search your state legislature’s website for terms like ‘construction defect’ or ‘implied warranty of habitability’ to find the controlling statute.
Filing a warranty claim correctly:
Send written notice to the contractor by certified mail with return receipt requested. The notice should:
- Identify each defect specifically by location and description, not ‘the floors are bad’ but ‘the hardwood flooring in the master bedroom has a visible hump approximately 18 inches from the north wall, and the subfloor flexes audibly when walked on in that area.’
- Reference the contract provision or warranty language that covers the defect.
- Request inspection and repair within a specific, reasonable timeframe, 30 days is commonly cited as reasonable for non-emergency defects; 72 hours or less for conditions that pose a safety risk or risk of ongoing damage.
- State clearly that you are preserving all legal rights.
Keep the certified mail receipt and the signed return card. These prove the contractor received notice on a specific date, which is critical if the dispute escalates.
Do not allow the contractor to make repairs without first documenting the defect thoroughly and getting the proposed repair scope in writing. A contractor who patches over a defect without addressing the underlying cause has not fulfilled a warranty obligation, and you need documentation showing what the original condition was to prove that if the repair fails.
Legal Recourse and When to Escalate
If a contractor refuses to respond to written notice, denies the defects, or makes repairs that fail, several escalation paths are available. The right path depends on the dollar amount at stake, the nature of the defect, and how much time has passed since the work was completed.
Step 1: File a complaint with the state contractor licensing board.
This is almost always the most effective first step for licensed contractors, and it costs nothing. Every state that licenses contractors maintains a disciplinary process. A formal complaint puts the contractor’s license at risk, which creates a powerful incentive to resolve the dispute that threatening a lawsuit often does not.
To file effectively:
- Submit your complaint in writing with copies of your documentation attached.
- Be specific about dates, amounts, and the nature of each defect.
- Request that the board investigate whether the work violated the contractor’s licensing standards.
Licensing board complaints are public record in most states once resolved, which means an unresolved pattern of complaints against a contractor becomes visible to future homeowners. Many contractors settle disputes quickly once a board complaint is filed rather than risk a public disciplinary record.
If the contractor was unlicensed, this path is unavailable, which is itself a significant legal advantage for you, unlicensed contracting is illegal in most states, and a contractor who performed work without a required license may be unable to enforce the contract or collect any unpaid balance, while you retain full legal rights to pursue damages.
Step 2: Demand letter from an attorney.
For disputes involving several thousand dollars or more, a demand letter from a construction attorney often produces faster results than a homeowner’s letter alone. The letter signals that you have retained counsel, have assessed the legal merits, and are prepared to proceed. Many disputes resolve at this stage without litigation.
Construction attorneys typically offer initial consultations at low or no cost. Use that consultation to assess whether your facts support a viable claim before committing to full representation.
Step 3: Small claims court.
For disputes below your state’s small claims limit, which ranges from roughly $5,000 to $25,000 depending on the state, small claims court allows you to present your case without an attorney. Bring your photographic documentation, your written communications, your contract, and if possible, a written estimate from a licensed contractor quantifying the cost to correct the defects. That repair estimate is your damages figure.
Small claims court judges are accustomed to construction disputes. A clear, organized presentation of documented defects and a credible repair estimate is often sufficient to obtain a judgment.
Step 4: Mediation.
Mediation is worth considering before or instead of litigation for disputes where the dollar amount is significant but the facts are genuinely disputed. A neutral mediator facilitates negotiation between the parties and helps identify a resolution both sides can accept. It is faster and substantially less expensive than litigation, and it preserves the option to litigate if mediation fails.
Many contractor associations and state bar associations offer mediation referral services. Some construction contracts include mandatory mediation clauses, check your contract before filing suit, because skipping a required mediation step can complicate your legal position.
Step 5: Construction defect litigation.
Litigation is appropriate when the defects are serious, the dollar amount is substantial, and earlier steps have failed. Construction defect cases are fact-intensive and typically require expert witnesses, licensed engineers or contractors who can testify about the standard of care and how the defendant’s work fell below it. This makes litigation expensive, and the decision to pursue it should be made with full awareness of the costs and timeline involved.
Critically, construction defect claims are subject to statutes of limitations and statutes of repose that vary by state. A statute of limitations typically begins running when you discover the defect. A statute of repose sets an absolute deadline from the date of substantial completion, regardless of when the defect was discovered. Missing either deadline bars your claim permanently. If you are considering litigation, consult an attorney promptly, delay is the single most common reason valid construction defect claims cannot be pursued.
What about the contractor’s bond?
Many licensed contractors are required to carry a surety bond as a condition of licensure. If a contractor fails to complete work or causes damage, a claim against the bond may provide compensation without requiring litigation against the contractor directly. Contact your state licensing board to determine whether the contractor carried a bond and how to file a claim against it.
The single most important thing you can do when dealing with bad contractor work is to act quickly. Warranty periods are short, statutes of limitations run from the date of discovery, and statutes of repose run from the date of completion regardless of when you found the problem. Document immediately, communicate in writing by certified mail, escalate to the licensing board before threatening litigation, and consult a construction attorney before any deadline passes. Every week of delay narrows your options.
What Good Workmanship Actually Looks Like: Setting the Standard
Understanding poor workmanship is only half the equation. Knowing what quality looks like gives you a benchmark to hold contractors accountable before a project is complete.
Good workmanship means floors that are flush and level throughout, with no gaps at transitions or baseboards. Paint is applied in consistent coats over properly prepared surfaces, with no visible texture variation or color inconsistency. Drywall seams disappear completely under paint. Tile is set with consistent grout lines and no lippage between adjacent tiles. Fixtures are plumb, level, and mounted securely with no movement.
At the infrastructure level, quality work means wiring that meets or exceeds code, properly sealed penetrations through the building envelope, and materials that match what was specified in the contract. Every connection, joint, and seal should be treated as if it will be inspected, because in a well-run project, it will be.
The difference between a durable renovation and a costly repair cycle almost always comes down to contractor oversight and attention to detail during the finish phase. A contractor who is proud of their work invites scrutiny. One who rushes the final walkthrough usually has something to hide.
For homeowners who want the assurance of meticulous attention to detail and professional expertise across both minor updates and major structural work, the standard set by Tony’s Home Improvement LLC reflects what quality residential and commercial workmanship should look like: clear communication, economical material sourcing, and results that hold up to inspection.
As the National Association of Home Builders’ resources on construction quality standards notes, the best protection against substandard work is selecting contractors with verifiable track records and insisting on documented specifications before any work begins.
Frequently Asked Questions
What are the most common signs of poor quality home workmanship?
Common signs of poor quality home workmanship include uneven or sloping floors, cracks in walls and ceilings, peeling paint and roller marks, misaligned fixtures and doors, visible drywall seams, water intrusion stains, and missing GFCI outlets near water sources. During a new home construction walkthrough or after a renovation, these issues often signal substandard work, inadequate surface preparation, or poor subcontractor coordination that can lead to costly repairs if left unaddressed.
Can poor workmanship cause serious structural damage over time?
Yes, signs of poor quality home workmanship that appear cosmetic can mask deeper structural integrity problems. For example, settling cracks may indicate foundation shifting, while moisture damage from poor sealing can compromise subflooring and framing over time. Electrical hazards from improper wiring pose safety issues beyond aesthetics. Catching construction defects early, ideally through a professional home inspector, prevents minor problems from escalating into major structural failures requiring expensive intervention.
What should I look for on a home inspection checklist for poor workmanship?
A solid home inspection checklist for poor workmanship should cover: flush and level floors and walls, properly sealed windows and doors, correctly installed GFCI outlets in kitchens and bathrooms, consistent paint finish without roller marks or peeling, tight drywall seams, aligned fixtures and cabinetry, no signs of water intrusion or moisture damage, and compliance with local building codes. Checking both visible finishes and hidden infrastructure, like electrical panels and subfloor conditions, gives the most complete picture.
How do I deal with bad contractor work and what are my legal options?
To deal with bad contractor work, start by documenting all construction defects with dated photos and written records. Review your contract for warranty clauses and notify the contractor in writing, requesting repairs within a specific timeframe. If unresolved, file a complaint with your state contractor licensing board. For significant financial losses, small claims court or mediation are options. Many states also have implied warranty protections for new home construction, so consulting a construction attorney can clarify your legal recourse based on regional building code standards.
How do I know if my renovation meets building code standards?
The clearest way to verify compliance is to request copies of all permits and final inspection sign-offs from your contractor. Common building code violations, like missing GFCI outlets, improper stair riser heights, or inadequate ventilation, are often invisible to untrained eyes. Hiring a licensed home inspector after a renovation provides an independent assessment. Keep in mind that building standards vary by region, so what passes in one jurisdiction may be a violation in another. Always verify against your local municipality's current code requirements.
Identifying construction defects early is the difference between a manageable repair and a costly structural failure. Tony’s Home Improvement LLC brings professional expertise, meticulous attention to detail, and efficient project management to every residential and commercial project, ensuring work is completed to a standard that holds up to scrutiny. Contact Tony’s Home Improvement LLC to get your renovation or repair done right the first time.
This article was written using GrandRanker
 Tony's Home Improvement LLC
Leave a comment