Table of Contents
- Top Bathroom Remodel Ideas by Design Style
- Small Bathroom Remodel Ideas That Maximize Every Inch
- Vanity, Storage, and Fixture Upgrades That Make a Difference
- Tile, Flooring, and Wall Treatments: Materials That Last
- DIY Bathroom Remodel Tips to Save Money Without Cutting Corners
- Bathroom Remodel Cost Breakdown: What to Budget For
- Bathroom Renovation Timeline: Phase by Phase
- Smart Tech, Eco-Friendly Upgrades, and Universal Design
- Conclusion: Turn Your Bathroom Vision Into Reality
Last Updated: May 22, 2026
The bathroom is one of the most-used rooms in any home, yet it’s consistently one of the most neglected when it comes to updates. Exploring bathroom remodel ideas is the fastest way to add real value to your property while improving daily life. At Tony’s Home Improvement LLC, we’ve helped hundreds of homeowners transform outdated bathrooms into spaces they actually enjoy. Below, we’ll walk you through 30 inspiring upgrades organized by design style, budget, and scope, so you can find the right approach for your specific situation.
Here’s what most guides get wrong: they lead with aesthetics and bury the practical details. A beautiful bathroom that leaks, lacks storage, or costs twice the original estimate isn’t a success. This guide covers both the inspiration and the execution, from tile selection to renovation timelines to smart technology worth installing in 2026.
Top Bathroom Remodel Ideas by Design Style
Design style is the foundation of any bathroom remodel. Getting this decision right early prevents costly mid-project pivots.
The three dominant styles in 2026 are modern/minimalist, traditional, and transitional. Each has a distinct material palette, fixture profile, and spatial logic. Choosing the wrong one for your home’s overall aesthetic creates a jarring disconnect that’s hard to fix without starting over.
Modern and Minimalist Bathrooms
Modern bathrooms prioritize clean lines, concealed storage, and a restrained material palette. The hallmarks are wall-mounted vanities with undermount sinks, frameless shower enclosures, and large-format porcelain tile that minimizes grout lines. Faucet hardware tends toward matte black or brushed nickel rather than polished chrome.
The floating bathroom vanity is the single most transformative element in a modern remodel. It creates visual space on the floor, making even a compact bathroom feel larger. Pair it with shaker cabinets in a matte white or deep charcoal finish and you have a combination that photographs well and ages gracefully.
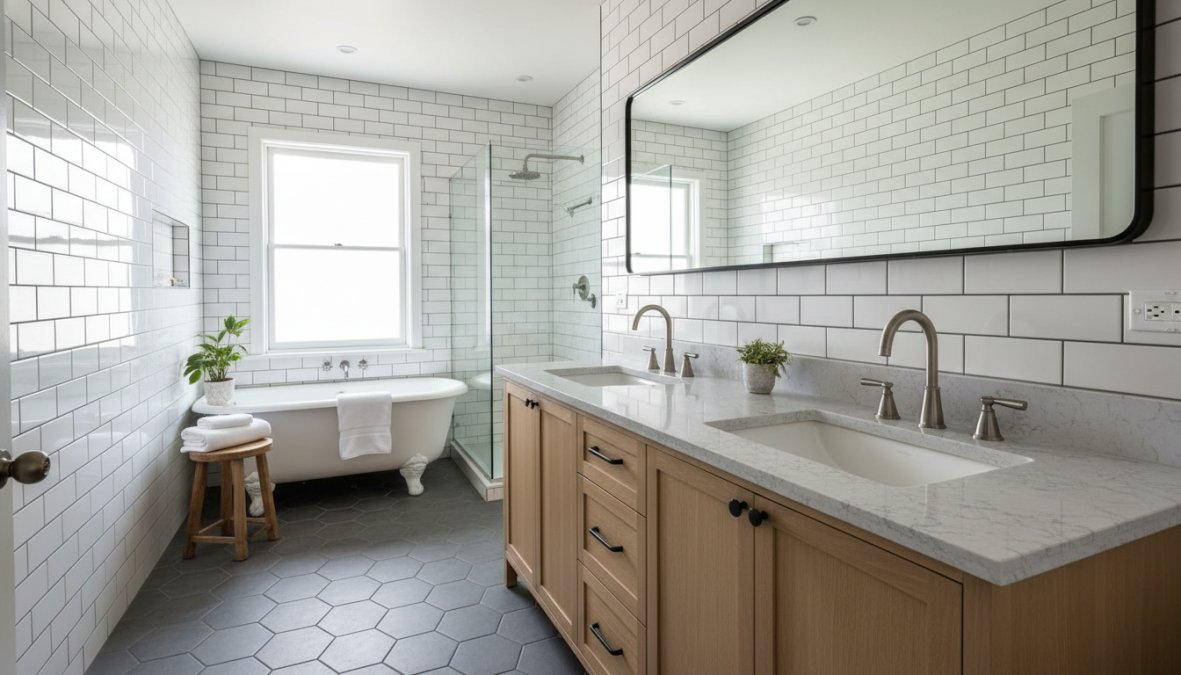
For shower enclosures, frameless glass panels are the modern standard. They show off the tile work inside and keep the visual field open. Subway tile remains popular as an interior wall treatment, but the trend in 2026 is moving toward larger formats (4×12 or 4×16) laid in a stacked vertical pattern rather than the classic horizontal brick pattern.
Traditional and Transitional Design
Traditional bathrooms lean into warm wood tones, decorative hardware, and marble countertops. Pedestal sinks, freestanding soaking tubs, and wainscoting are signature elements. The aesthetic rewards detail work, which means higher labor costs but also higher perceived value.
Transitional design sits between modern and traditional, and it’s the most popular choice for a reason: it’s forgiving. You can mix a shaker cabinet vanity with modern faucet hardware, or combine subway tile with a more ornate mirror frame, without the design feeling confused. Transitional bathrooms tend to age better because they’re not locked into a specific era’s trends.
The backsplash is where transitional design earns its keep. A classic white subway tile backsplash with dark grout reads as both contemporary and timeless. Add unlacquered brass hardware and you’ve created a bathroom that will still look intentional a decade from now.
Small Bathroom Remodel Ideas That Maximize Every Inch
Layout decisions matter more than aesthetics in a small bathroom. You can have the most beautiful tile in the world and still end up with a bathroom that feels cramped and dysfunctional if the spatial planning is wrong.
Small bathroom remodel ideas work best when they prioritize the vertical dimension. Most small bathrooms have unused wall space above the toilet, beside the mirror, and above the door. Recessed medicine cabinets eliminate the visual bulk of surface-mounted units while adding meaningful storage. Wall-mounted towel bars and hooks keep the floor clear.
Layout Tricks and Space Optimization
The most impactful small bathroom remodel ideas involve layout changes that don’t require moving plumbing. Here are the highest-ROI moves:
- Replace a swinging door with a pocket door or barn door to reclaim 6-8 square feet of usable floor space
- Install a corner shower enclosure to free up the center of the room
- Choose a wall-hung toilet to expose more floor area and make cleaning easier
- Use a single large mirror instead of two small ones to double the perceived depth of the room
- Select large-format porcelain tile for the floor rather than small mosaic tiles, which visually fragment the space
The shower enclosure choice is critical in a small bathroom. A frameless glass enclosure is always the right call because it keeps sight lines open. A frosted or textured glass panel adds privacy without closing off the space.
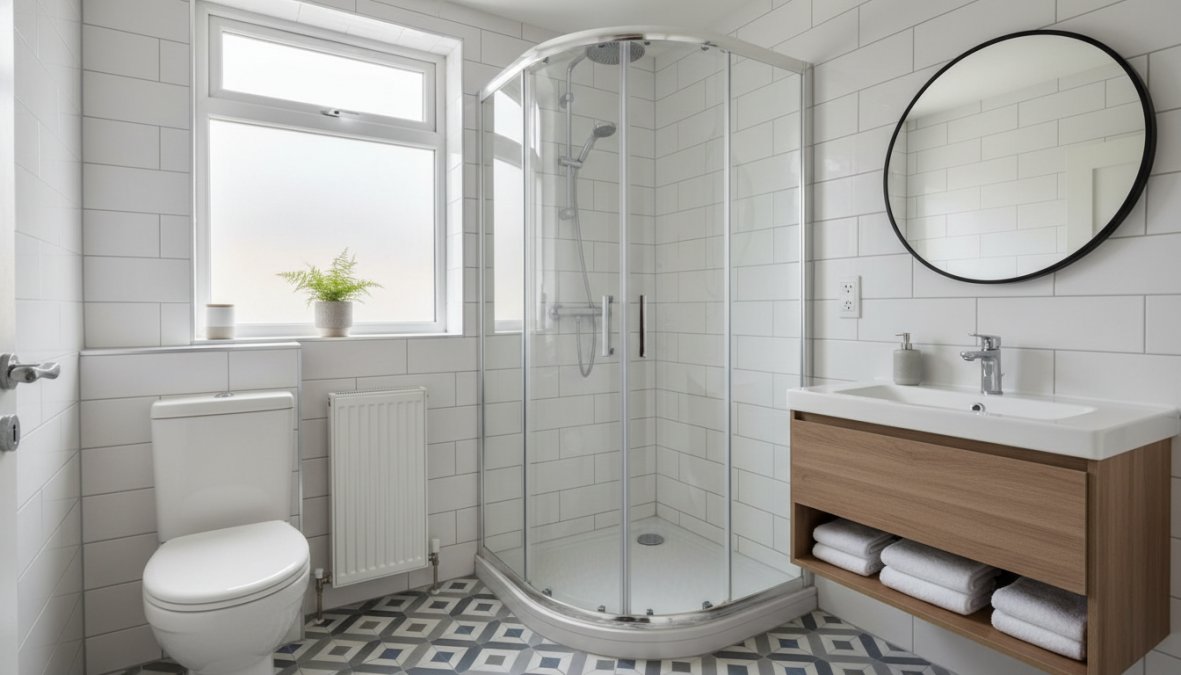
In small bathrooms, use the same tile on both the floor and the lower wall (called a “wet room” approach). Continuous material removes the visual boundary between surfaces and makes the room feel significantly larger without changing a single dimension.
According to the National Association of [Home(/2026/05/16/how-to-find-reliable-home-contractors/) Builders’ guide to bathroom design | nahb.org], adequate clearance in front of a toilet, sink, and shower is one of the most commonly violated standards in small bathroom renovations. Minimum 21 inches of clear floor space in front of any fixture should be treated as non-negotiable, not a suggestion.
Vanity, Storage, and Fixture Upgrades That Make a Difference
Forget the full gut renovation for a moment. Vanity and fixture upgrades alone can transform a bathroom’s feel without touching the plumbing rough-in, which is where the real cost lives.
A bathroom vanity replacement is the single highest-impact cosmetic upgrade available. A new vanity with an undermount sink and a quartz or marble countertop instantly modernizes a dated bathroom. The key is matching the vanity height to your household: standard height is 32 inches, but comfort height (34-36 inches) is increasingly preferred by adults and is a smart choice for aging-in-place considerations.
Storage solutions deserve more creative thinking than most homeowners give them. Built-in niches in the shower wall eliminate the need for a corner caddy and look far more intentional. A recessed medicine cabinet with interior lighting solves both storage and vanity lighting in one fixture. Drawer organizers inside the vanity cabinet make the difference between a bathroom that functions well and one that becomes a catch-all.
Faucet hardware is the jewelry of bathroom design. Swapping out dated polished brass or chrome fixtures for matte black, brushed gold, or brushed nickel hardware costs relatively little but changes the entire register of the room. The rule: match all hardware finishes in a single bathroom. Mixing finishes reads as indecision, not eclecticism.
Avoid purchasing a vanity and then measuring for plumbing after delivery. Always confirm your drain location and supply line positions before ordering. A misaligned drain can turn a weekend project into a week-long ordeal and add significant cost to an otherwise simple upgrade.
Tile, Flooring, and Wall Treatments: Materials That Last
Material selection is where bathroom remodel ideas either hold up over time or become expensive regrets. The bathroom environment is one of the most demanding in any home: sustained high humidity, daily temperature swings, standing water, and repeated cleaning with acidic or alkaline products. Most visual inspiration guides show you what materials look like. This section tells you how they actually perform, and what the spec sheet numbers mean for your specific application.
Porcelain Tile: The Technical Case for the Default Choice
Porcelain tile dominates bathroom renovations for reasons that go beyond aesthetics. The key technical distinction between porcelain and standard ceramic is water absorption rate: porcelain absorbs less than 0.5% of its weight in water (per ANSI A137.1 standards), compared to ceramic’s rate of up to 3%. In a wet environment, that difference compounds over years into dramatically different performance outcomes.
PEI Rating (Porcelain Enamel Institute wear rating) is the number most homeowners never look at but should. PEI ratings run from 0 to 5:
- PEI 0-1: Wall use only. Never use on floors.
- PEI 2: Residential bathroom walls and light-traffic floors.
- PEI 3: Residential floors with normal foot traffic. The minimum for a bathroom floor.
- PEI 4-5: Heavy residential and commercial use. Appropriate for high-traffic family bathrooms.
For shower floors specifically, the more relevant specification is the Dynamic Coefficient of Friction (DCOF). The ANSI A137.1 standard requires a wet DCOF of at least 0.42 for level interior floors. Shower floors should meet or exceed this threshold. Small-format mosaic tile (1×1 or 2×2) naturally achieves better slip resistance on shower floors because the higher grout-line density creates more texture and grip, this is the functional reason behind the design convention, not just aesthetics.
Large-format tile (24×24 or larger) is the current standard for bathroom floors and shower walls in mid-range to luxury renovations. The visual benefit is fewer grout lines and a cleaner look. The installation requirement is a flatter substrate: large-format tile requires a floor flatness tolerance of no more than 1/8 inch variation over 10 feet (tighter than the standard 3/16 inch tolerance for smaller formats). If your subfloor doesn’t meet this spec, the tile will crack at the corners, a failure mode that appears months after installation and is expensive to fix.
Grout: The Most Overlooked Specification
Grout choice affects both maintenance burden and long-term performance more than most homeowners realize.
- Sanded grout is used for joints wider than 1/8 inch. The sand particles prevent shrinkage cracking in wider joints.
- Unsanded (non-sanded) grout is used for joints 1/8 inch or narrower, and for polished stone where sand would scratch the surface.
- Epoxy grout is the premium option for wet areas. It is non-porous, requires no sealing, resists staining and mold, and is significantly harder to install (it sets quickly and requires careful mixing and timing). For shower floors and walls, epoxy grout is worth the additional labor cost.
- Standard cement-based grout requires sealing every 1-2 years in wet areas. Unsealed cement grout in a shower is the leading cause of mold growth behind tile.
Grout color is a design decision with maintenance consequences. Dark grout on light tile looks intentional and hides staining, but shows efflorescence (white mineral deposits) more visibly. Light grout on light tile reads as seamless and spa-like but requires more frequent cleaning in wet zones.
Subway Tile: What the Spec Sheet Doesn’t Tell You
Subway tile remains the most versatile wall treatment in bathroom design, but the product category spans an enormous range of quality. The original subway tile format (3×6 inches) was a dense, vitreous ceramic developed for the New York City subway system in the early 1900s specifically for its durability and ease of cleaning. Modern subway tile ranges from that same dense, low-absorption ceramic to thin, high-absorption wall tile that should never be used in a wet zone.
When selecting subway tile for a shower surround, confirm the water absorption rate is below 3% (wall tile) or 0.5% (porcelain). Tile marketed as "decorative" or "accent" tile frequently has absorption rates that make it unsuitable for wet applications, regardless of how it looks in a showroom.
The layout pattern affects both the visual result and the installation cost:
- Horizontal brick (running bond): Classic, fastest to install, lowest labor cost.
- Vertical stacked: Contemporary, requires more precise alignment, slightly higher labor.
- Herringbone: High visual impact, significantly more labor-intensive, generates more tile waste (budget 15% overage vs. the standard 10%).
- Vertical brick (offset): A modern alternative to horizontal that reads as taller and more current.
Countertop Materials: The Honest Trade-Off Matrix
| Material | Water Resistance | Scratch Resistance | Requires Sealing | Relative Cost |
|---|---|---|---|---|
| Engineered Quartz | Excellent | Excellent | No | Moderate-High |
| Marble (natural) | Poor (etches) | Poor | Yes, annually | High |
| Granite (natural) | Good | Excellent | Yes, annually | Moderate |
| Porcelain Slab | Excellent | Excellent | No | High |
| Laminate | Fair | Fair | No | Low |
| Solid Surface (e.g., Corian) | Good | Fair (repairable) | No | Moderate |
Engineered quartz is the practical default for bathroom vanity countertops: non-porous, no sealing required, and available in patterns that closely replicate natural marble. The trade-off is that it can be damaged by prolonged exposure to direct sunlight (UV degradation) and very high heat, neither of which is typically a concern in a bathroom.
Natural marble is beautiful and adds genuine perceived value, but it is calcium carbonate, it reacts chemically with acidic substances including many common bathroom products (toothpaste, some cleansers, citrus-based products). The resulting etching is a surface dullness that is distinct from scratching and cannot be buffed out without professional honing. If you choose marble, use pH-neutral cleaning products exclusively and seal it every 12 months.
Porcelain slab countertops are an emerging category that offers the visual of natural stone with none of the maintenance requirements. They are cut from large-format porcelain panels (often 120×60 inches or larger) and are non-porous, heat-resistant, and UV-stable. The installation requires specialized fabrication equipment, which limits availability and increases cost, but the long-term performance case is strong.
Sustainable Material Choices: The Content Gap Most Guides Miss
Most tile and flooring guides focus entirely on aesthetics and durability. The environmental dimension of material selection is largely ignored, and it’s increasingly relevant to homeowners who want their renovation to reflect their values as well as their taste.
Recycled content tile is now widely available from major manufacturers. Recycled glass tile uses post-consumer glass (often from bottles and windows) as its primary raw material. It is non-porous, does not require sealing, and is available in a range of formats suitable for backsplashes and accent walls. It is not recommended for floor applications due to hardness and slip resistance limitations.
Reclaimed wood for vanity tops or accent walls adds warmth and character while diverting material from landfill. The practical requirement is proper sealing: reclaimed wood in a bathroom must be finished with a waterproof topcoat (marine-grade polyurethane or similar) and kept away from direct water contact. It is not appropriate for wet zone applications.
Low-VOC adhesives and grouts matter more in a bathroom than in most other rooms because bathrooms are small, often poorly ventilated spaces. Standard tile adhesives and grout release volatile organic compounds during and after installation. Low-VOC or zero-VOC alternatives are available from most major manufacturers at comparable cost and performance.
Locally sourced tile reduces transportation emissions and often supports faster lead times. Several U.S.-based tile manufacturers produce porcelain and ceramic tile domestically. Specifying domestic product is a straightforward way to reduce the carbon footprint of your renovation without any performance trade-off.
The contrarian take on sustainable remodeling bears repeating here: the most sustainable renovation is one that uses durable materials that don’t need replacing for 20 years. A budget tile that fails in five years and ends up in a landfill, along with the cement board, waterproofing membrane, and labor that went with it, has a far higher environmental cost than a premium porcelain installed once and maintained properly for a generation.
Substrate and Waterproofing: The Foundation Nobody Photographs
As documented in the Tile Council of North America’s installation standards, proper substrate preparation is the leading factor in long-term tile performance. The substrate is the layer between your framing and your tile, and it is the most important thing in your bathroom that no one will ever see.
For wet areas (shower walls, shower floors, areas within splash range of the tub):
- Cement board (such as HardieBacker or Durock) is the standard substrate. It will not deteriorate when wet, unlike standard drywall or greenboard.
- Uncoupling membranes (such as Schluter Ditra) installed over the cement board allow for slight independent movement between the substrate and tile, dramatically reducing the risk of cracking in large-format tile installations.
- Liquid waterproofing membranes applied over cement board before tiling create a continuous waterproof barrier. This is the current best practice for shower walls and floors and is required by most building codes for wet zone applications.
Skipping or shortcutting any of these layers to save money is the most common cause of tile failure, and the most expensive repair scenario, because fixing it requires demolishing the tile work entirely.
Before any tile installation begins, ask your contractor specifically what substrate system they are using in the wet zone and whether they are applying a liquid waterproofing membrane. A contractor who cannot answer this question clearly, or who says waterproofing is unnecessary, is a contractor worth replacing before work starts.
DIY Bathroom Remodel Tips to Save Money Without Cutting Corners
DIY bathroom remodel tips tend to cluster around cosmetic work, and that’s exactly right. The money-saving opportunities in a bathroom renovation are almost entirely in the finish work, not the structural or mechanical systems.
Here’s the honest breakdown of what to DIY and what to hire out:
DIY with confidence:
- Painting walls and ceilings
- Installing a new bathroom vanity (if plumbing connections are accessible)
- Replacing faucet hardware and shower fixtures
- Installing a new toilet
- Tiling a backsplash (with proper prep and the right adhesive)
- Installing light fixtures (with power off and basic electrical knowledge)
Hire a professional:
- Moving or rerouting plumbing supply or drain lines
- Installing a new shower pan or wet area waterproofing
- Any work requiring permits (see permitting section below)
- Electrical work inside wet zones (within 6 feet of water sources)
The biggest DIY mistake in bathroom renovations is underestimating the prep work. A tile installation fails not because of the tile or the adhesive, but because the substrate wasn’t flat, clean, and properly waterproofed. Spend twice as long on prep as you think you need to.
DIY bathroom remodel tips save the most money on labor-intensive finish work: painting, fixture swaps, and accessory installation. The real savings come from being realistic about your skill level and not DIY-ing work that requires permits or licensed tradespeople, which can create liability issues when you sell the home.
A guide to bathroom renovation permits from the International Code Council clarifies which bathroom projects require permits in most jurisdictions. Generally: cosmetic work doesn’t require permits, but any work involving plumbing rough-in changes, electrical panel work, or structural modifications does.
Bathroom Remodel Cost Breakdown: What to Budget For
A bathroom remodel cost breakdown depends almost entirely on scope, but vague ranges don’t help you plan a real project. Below are the cost tiers most contractors and industry sources consistently report for U.S. markets as of 2025-2026. Prices vary by region, material grade, and labor market, but these figures give you a defensible starting point for conversations with contractors.
| Remodel Scope | Typical Cost Range | What’s Included |
|---|---|---|
| Cosmetic Refresh | $1,500 – $5,000 | Paint, faucet hardware, light fixtures, mirror, accessories, toilet seat |
| Mid-Range Remodel | $8,000 – $20,000 | New vanity, toilet, tile floor and surround, lighting, basic plumbing fixture swap |
| Full Gut Renovation | $20,000 – $40,000 | Layout changes, new plumbing rough-in, full tile, custom vanity, shower enclosure |
| Luxury Master Bath | $40,000 – $80,000+ | Custom cabinetry, heated floors, walk-in shower, freestanding soaking tub, smart fixtures |
These ranges reflect mid-grade materials and standard labor rates. High cost-of-living markets (New York, San Francisco, Boston) typically run 20-40% above the upper end of these ranges. Rural markets may come in below the lower end.
Where Your Budget Actually Goes
Understanding the cost split by category is more useful than a single total number, because it tells you where negotiation and substitution are possible.
For a typical mid-range bathroom remodel, the budget tends to break down roughly as follows:
- Labor: 40-50% of total project cost. This is the largest single line item and the hardest to compress without sacrificing quality or timeline. Tile setters, plumbers, and electricians are licensed trades, their rates reflect that.
- Fixtures and fittings: 15-20%. Toilet, vanity sink, faucets, showerhead, and shower valve. This is where you can move up or down in quality without affecting labor cost significantly.
- Tile and flooring materials: 10-15%. Material cost for tile is often lower than homeowners expect; the labor to install it is where the cost lives.
- Cabinetry and vanity: 10-15%. Stock vanities from home improvement retailers start around $200-$600. Semi-custom and custom cabinetry can run $2,000-$8,000 for a single vanity.
- Lighting and accessories: 5-10%. Often underbudgeted. A quality vanity light bar, exhaust fan, and recessed lighting package can easily reach $800-$1,500 installed.
- Permits and inspections: 2-5%. Frequently omitted from early estimates. Permit fees vary widely by municipality, from under $100 for a simple fixture swap to $500-$1,500 for a full renovation with plumbing and electrical changes.
The Hidden Costs Most Estimates Miss
The remodeling budget items that most commonly cause mid-project surprises are not the glamorous ones:
Demolition and disposal. Removing old tile, a cast-iron tub, or a built-in vanity takes time and generates significant debris. Dumpster rental or haul-away fees of $300-$600 are common and rarely appear in initial contractor quotes.
Substrate and waterproofing. Once old tile comes off, the substrate underneath frequently needs replacement. Cement board, uncoupling membranes (such as Schluter Ditra), and liquid waterproofing membranes for wet areas add $500-$1,500 to a mid-range project but are non-negotiable for long-term performance.
Hidden water damage. Industry experience consistently shows that a meaningful percentage of bathroom gut renovations uncover some degree of water damage behind walls or under floors, particularly around the shower pan and toilet base. Budget a contingency of 10-15% of your total project cost specifically for this scenario. If you don’t need it, great. If you do, you won’t have to stop the project.
Exhaust ventilation upgrades. Many older bathrooms have undersized or poorly routed exhaust fans. Upgrading to a properly sized unit (measured in CFM relative to bathroom square footage) and re-routing the duct to actually exit the building, not just into the attic, is a code requirement in most jurisdictions and adds $200-$600 to the project.
How to Get an Accurate Estimate
The most reliable way to budget a bathroom remodel is to get three itemized bids from licensed contractors, not lump-sum quotes. An itemized bid breaks out labor, materials, permits, and contingency separately. This lets you compare bids accurately and identify where one contractor is cutting corners or another is padding margin.
Before any contractor walks through your bathroom, have your design decisions finalized: tile selection, vanity model, fixture finishes, and any layout changes. Contractors cannot give you an accurate number if the scope is undefined. Vague scope produces vague estimates, which produces budget surprises.
Be cautious of any bid that comes in significantly below the others. In bathroom remodeling, a low bid almost always means something is excluded, typically waterproofing, permit fees, or disposal, or the contractor plans to use lower-grade materials than specified. Ask for a line-item explanation of any bid that is more than 20% below the median of your other quotes.
Tony’s Home Improvement LLC provides fully itemized estimates with transparent material sourcing so clients understand exactly where their budget is going before work begins. That clarity prevents the mid-project surprises that derail most renovation timelines and strain contractor-client relationships.
Bathroom Renovation Timeline: Phase by Phase
A realistic bathroom renovation timeline is the thing most homeowners underestimate most severely. The project always takes longer than the optimistic estimate, and the reasons are predictable.
Here’s a phase-by-phase breakdown for a mid-range bathroom remodel:
- Planning and design (2-4 weeks): Finalize layout, select all materials, confirm contractor availability. Order special-order tile or fixtures now, not after demo.
- Permitting (1-3 weeks): If your project requires permits, factor in processing time. Some jurisdictions offer expedited review.
- Demolition (1-3 days): Removal of existing fixtures, tile, and drywall. This phase often reveals hidden problems: water damage, mold, or outdated plumbing.
- Rough-in work (3-5 days): Plumbing and electrical rough-in changes, if any. Substrate installation (cement board, waterproofing membrane).
- Tile installation (3-7 days): Floor tile, shower tile, backsplash. Allow full cure time before grouting.
- Fixture installation (2-3 days): Vanity, toilet, shower fixtures, lighting.
- Finish work and punch list (1-2 days): Caulking, painting touch-ups, accessory installation, final inspection.
Total realistic timeline for a mid-range remodel: 4-8 weeks from permit approval to completion. Full gut renovations in master bathrooms can run 10-12 weeks.
The renovation timeline most commonly extends due to material lead times and hidden demolition discoveries. Order everything before demo day. If your tile is back-ordered, your entire project stalls.
Smart Tech, Eco-Friendly Upgrades, and Universal Design
The most forward-thinking bathroom remodel ideas in 2026 address three areas that most visual inspiration guides completely ignore: smart technology, sustainability, and accessibility. Getting these right future-proofs your renovation against the next decade of changes.
Smart Bathroom Technology Worth Considering
Smart bathroom technology is no longer the exclusive domain of luxury renovations. Several categories have reached mainstream price points and deliver genuine daily utility.
The highest-value smart upgrades are:
- Heated floors: Electric radiant floor heating under tile is the single most requested smart upgrade. It’s installed during the tile phase and runs on a programmable thermostat.
- Smart mirrors: Integrated LED lighting, defogging, and Bluetooth speakers in a single fixture. Particularly useful in bathrooms without adequate natural light.
- Digital shower controls: Precise temperature control and preset profiles eliminate the cold-water scramble. Premium systems allow pre-heating the shower from a phone app.
- Motion-activated night lighting: Low-voltage LED strips under the vanity or along the baseboard that activate when someone enters the bathroom at night. Simple to install, genuinely useful.
The thing nobody tells you about smart bathroom technology is that most of it requires planning during the rough-in phase. Running conduit for a smart mirror or adding a dedicated circuit for a heated floor is straightforward during construction. Retrofitting it afterward is expensive and disruptive.
Sustainable and Eco-Friendly Remodeling
Sustainable bathroom remodeling is one area where the right choice for the environment is also frequently the right choice for your water bill. According to the EPA WaterSense program’s resource center, replacing older toilets with WaterSense-certified models and installing low-flow showerheads are among the highest-impact water conservation measures available to homeowners.
Eco-friendly remodeling choices that make practical sense:
- WaterSense-certified toilets and faucets reduce water consumption without sacrificing performance
- Reclaimed wood vanity tops or recycled glass tile add character while reducing material waste
- Low-VOC paint and adhesives improve indoor air quality, which matters in a small, often poorly-ventilated space
- LED lighting throughout reduces energy consumption and lasts significantly longer than incandescent alternatives
- Choosing local tile manufacturers reduces transportation emissions and often supports faster lead times
The contrarian take on sustainable remodeling: the greenest renovation is often the one that uses durable materials that don’t need replacing for 20 years. A cheap tile that fails in five years and ends up in a landfill is far less sustainable than a premium porcelain that lasts a generation.
Universal Design and Aging-in-Place Features
Universal design is the most underrated category in bathroom remodel ideas, and it’s the one most homeowners wish they’d addressed earlier. A bathroom designed for accessibility serves everyone better, not just people with mobility challenges.
The core aging-in-place features to incorporate during any significant bathroom remodel:
- Curbless walk-in shower: Eliminates the trip hazard of a traditional shower threshold. Easier to clean. Works for everyone from toddlers to elderly adults.
- Grab bars: Installed during the tile phase with blocking in the wall, grab bars can be added later without structural work. Planning for them now costs almost nothing.
- Comfort-height toilet: At 17-19 inches, it’s easier to use for adults of all ages and reduces strain on knees and hips.
- Wider doorway: A 36-inch door accommodates a wheelchair and makes the bathroom feel more open. Relevant if you’re already moving walls.
- Non-slip flooring: Textured porcelain tile or small-format mosaic tile (which has more grout lines for grip) on the shower floor.
The practical argument for universal design isn’t just about aging: it increases your home’s resale appeal to a broader buyer pool, and many of these features are invisible in their impact on aesthetics while being significant in their impact on daily function.
Transforming a bathroom requires more than a good idea. It requires accurate planning, reliable execution, and materials that perform over time. Tony’s Home Improvement LLC brings professional expertise, meticulous attention to detail, and economical material sourcing to every bathroom renovation, whether you’re refreshing a powder room or gutting a master bathroom. The team communicates clearly at every phase, so your renovation timeline stays on track and your budget stays intact. Contact Tony’s Home Improvement LLC to discuss your project and get a realistic assessment of what your bathroom remodel ideas will actually take to execute.
Frequently Asked Questions
What is the most cost-effective way to remodel a bathroom?
The most budget-friendly bathroom remodel ideas focus on cosmetic updates rather than structural changes. Repainting walls, replacing faucet hardware, swapping out a bathroom vanity, and adding a new backsplash can dramatically refresh a space without moving plumbing fixtures. Keeping the existing bathroom layout intact is the single biggest way to control costs, as relocating pipes and drains adds significant labor expense to any renovation budget.
How much does a typical bathroom remodel cost?
Bathroom remodel costs vary widely based on scope. A basic DIY bathroom refresh might run a few hundred dollars, while a mid-range renovation with new tile, a vanity, and updated plumbing fixtures typically falls in the $5,000-$15,000 range. A full master bathroom gut remodel with a walk-in shower, marble countertops, and premium materials can exceed $25,000. Getting a detailed bathroom remodel cost breakdown from a contractor upfront helps avoid budget surprises.
Do I need a permit for a bathroom remodel?
Permit requirements depend on the scope of your project and your local municipality. Cosmetic updates like painting, replacing a faucet, or installing new flooring typically don't require permits. However, any work involving moving or adding plumbing fixtures, electrical wiring changes, or structural modifications usually does. Always check with your local building department before starting. Skipping required permits can create issues when selling your home and may result in fines.
How can I make a small bathroom look bigger?
Several small bathroom remodel ideas can create the illusion of more space. Use large-format porcelain tile on the floor to reduce grout lines and visually expand the room. Install a frameless shower enclosure instead of a curtain. Choose a wall-mounted vanity to free up floor space. Apply consistent wall treatment and flooring throughout to avoid visual breaks. Maximizing lighting design with layered fixtures also brightens the space and makes it feel more open and airy.
What is the typical bathroom renovation timeline from start to finish?
A bathroom renovation timeline depends heavily on project scope. A simple cosmetic refresh can be completed in a weekend, while a mid-range remodel typically takes one to three weeks once materials arrive. A full gut renovation of a master bathroom, involving new plumbing fixtures, tile work, a walk-in shower, and electrical updates, can run three to six weeks. Planning and material lead times should be factored in, as some items like custom vanities or specialty tile may add weeks to the schedule.
This article was written using GrandRanker
 Tony's Home Improvement LLC
Leave a comment