Table of Contents
- Best Bathroom Renovation Tips for Beginners: Start With a Solid Plan
- Bathroom Remodel Budget Breakdown: What Beginners Should Expect
- Your Bathroom Renovation Checklist for Beginners
- Essential Tools for Bathroom Renovation Every Beginner Needs
- How Long Does a Bathroom Renovation Take for Beginners
- Tile, Flooring, Vanity, and Fixture Upgrades That Transform Any Bathroom
- Smart, Eco-Friendly, and Universal Design Features Worth Adding
- Best Bathroom Renovation Tips for Beginners: Common Mistakes to Avoid
- Conclusion
Last Updated: May 23, 2026
Tackling a bathroom remodel for the first time is genuinely intimidating. The best bathroom renovation tips for beginners all point to the same truth: planning kills more projects than hammers do. At Tony’s Home Improvement LLC, we’ve helped dozens of homeowners transform dated, cramped bathrooms into spaces they actually enjoy, and the pattern is consistent: the renovations that go smoothly share a foundation of smart preparation, realistic budgets, and clear design direction. Below, we’ll walk you through exactly how to build that foundation, avoid the mistakes that derail first-timers, and make decisions that hold up over time.
According to the National Association of the Remodeling Industry’s cost vs. value data, bathroom remodels consistently rank among the highest-ROI home improvement projects. That’s the good news. The harder truth is that they’re also among the most technically complex, touching plumbing, electrical, waterproofing, and finish work all at once. Get the sequence wrong and you’re tearing out tile you just installed.
Best Bathroom Renovation Tips for Beginners: Start With a Solid Plan
A bathroom renovation without a plan is just expensive demolition. The single most valuable thing a beginner can do before buying a single tile is define the project scope in writing: what stays, what goes, and what the finished space needs to accomplish.
Most first-timers underestimate how much decisions compound on each other. The vanity you choose dictates the plumbing rough-in location. The shower enclosure size determines tile cut complexity. The lighting fixture placement depends on your mirror and cabinet layout. Starting with a plan forces those dependencies to the surface before they become expensive surprises.
Define Your Bathroom Design Style First
Bathroom design style is the visual and functional vocabulary that ties your fixture, tile, and material choices together. Choosing a style before purchasing anything prevents the mismatched-element problem that plagues most beginner renovations.
Three styles dominate residential bathrooms in 2026:
- Modern: Clean lines, minimal hardware, floating vanities, large-format porcelain tile, matte black or brushed nickel faucet hardware
- Traditional: Shaker cabinets, subway tile, chrome fixtures, undermount sinks with marble countertops, framed mirrors
- Transitional design: The most forgiving category for beginners, blending classic forms with contemporary finishes, such as shaker cabinets paired with matte black hardware and large-format tile
Pick one and commit. Transitional design is genuinely the safest starting point for beginners because it accommodates a wider range of tile and fixture combinations without looking incoherent.
Use Free Layout Tools to Visualize Your Space
Bathroom layout decisions made on paper almost always produce surprises in the field. Visualizing the space in 3D before you commit to anything is one of the best bathroom renovation tips for beginners that most guides skip entirely.
Two tools worth using:
RoomSketcher (roomsketcher.com) offers a drag-and-drop interface with an extensive library of bathroom fixtures. The free tier handles basic 2D and 3D layouts. It’s ideal for testing walk-in shower placement, vanity sizing, and door swing clearances before you finalize your plan.
MagicPlan (magicplan.app) uses your smartphone camera to scan and measure your bathroom instantly, generating accurate floor plans without manual tape measuring. The AR-powered scanning reduces measurement errors significantly, which matters when you’re ordering tile to the square foot.
Houzz Pro is worth exploring for larger projects. It combines 3D floor planning with budget estimation and project scheduling, which helps beginners manage the full renovation timeline, not just the design phase.
Before finalizing your layout, check the door swing radius and the distance between the toilet centerline and the nearest wall or fixture. Building codes typically require at least 15 inches from the toilet centerline to any obstruction. Getting this wrong means replumbing.
Bathroom Remodel Budget Breakdown: What Beginners Should Expect
Budget is where most beginner renovations fall apart, not because people overspend on tile, but because they plan only for the visible costs and ignore the structural ones. A realistic bathroom remodel budget breakdown requires thinking in tiers and percentages, not just a single total number.
The Three Budget Tiers: What Each Actually Buys
Bathroom renovations generally fall into three cost tiers based on scope and material quality. These ranges reflect typical costs for a full gut-and-replace of a standard 5×8 or 5×10 bathroom in the United States as of 2025-2026. Regional labor markets vary significantly, so treat these as planning anchors, not quotes.
| Tier | Typical Total Range | What It Includes |
|---|---|---|
| Budget | $5,000 – $10,000 | Cosmetic refresh: new fixtures on existing rough-in, tile replacement, vanity swap, paint |
| Mid-Range | $10,000 – $25,000 | Full gut renovation: new plumbing rough-in, cement board, waterproofing, tile, vanity, lighting, shower enclosure |
| Premium | $25,000 – $50,000+ | Structural changes, layout reconfiguration, high-end tile and stone, custom cabinetry, smart fixtures |
Most first-time renovators targeting a full bathroom transformation land in the mid-range tier. The budget tier is achievable only when plumbing and electrical rough-in locations are not moving, the moment you relocate a drain or add a circuit, costs escalate toward mid-range regardless of material choices.
How Costs Actually Break Down Within a Mid-Range Renovation
Understanding the proportional split of a renovation budget prevents the most common planning error: over-allocating to materials while underestimating labor and hidden costs.
For a typical mid-range full bathroom renovation, costs tend to distribute roughly as follows:
- Labor: The largest single category, often representing 40-50% of total project cost. Plumbers and electricians charge by the hour or by task, and their rates vary significantly by region. In high cost-of-living markets, licensed plumber rates can exceed $150/hour.
- Fixtures and fittings (toilet, vanity, faucets, showerhead, shower enclosure): Typically 20-30% of budget. This is where quality decisions have the longest-term impact.
- Tile and flooring materials: Usually 10-15% of budget, though premium stone or large-format porcelain can push this higher.
- Waterproofing, cement board, and substrate materials: Often 5-8%, and the category most frequently cut by beginners trying to reduce costs.
- Permits and inspection fees: Typically $100-$500 depending on jurisdiction and scope, but occasionally higher for projects involving plumbing or electrical changes.
- Demolition and debris disposal: Often overlooked entirely. Dumpster rental or junk hauling for a full gut renovation commonly runs $300-$600.
- Contingency reserve: Budget an additional 15-20% of your total estimate for unknowns. Behind-wall discoveries, corroded pipes, inadequate blocking, subfloor rot from a previous leak, are common in bathrooms and can add thousands to a project that looked straightforward during planning.
The contingency reserve is not optional padding. In bathrooms specifically, water damage behind walls is frequently invisible until demolition. A 2019 survey by the National Association of Home Builders found that unexpected structural or moisture damage is among the most common cost escalators in bathroom renovation. Budget for it before you start, not after you find it.
Where to Splurge and Where to Save
The most common beginner mistake is spending evenly across all categories. The better approach is deliberate allocation based on longevity, visibility, and replaceability.
Splurge on:
- Plumbing fixtures and faucet hardware. Cheap faucets fail within two to three years and are frustrating to replace once tile surrounds them. Brands with established warranty programs and widely available replacement parts, such as Moen, Delta, and Kohler, cost more upfront and meaningfully less over a decade.
- Waterproofing membrane in wet areas. Schluter Kerdi, RedGard liquid membrane, and similar products cost more than skipping this step. A failed waterproofing layer behind a walk-in shower leads to mold, subfloor rot, and a full tile tear-out within three to five years. This is the highest-consequence cost-cutting decision in any bathroom renovation.
- Shower enclosure or frameless glass door. This is the visual centerpiece of the bathroom. A quality frameless glass enclosure with proper hardware holds up to daily use and cleaning without the mold-prone rubber seals that plague cheaper framed alternatives.
- Exhaust fan. A properly sized, exterior-vented exhaust fan protects every other investment in the room. Panasonic WhisperCeiling and similar quiet, high-CFM models cost more than builder-grade fans but last significantly longer and actually move enough air to prevent moisture damage.
Save on:
- Decorative accessories (towel bars, toilet paper holders, robe hooks). These are surface-mounted and easily swapped. Buying them at a discount retailer and upgrading later costs almost nothing.
- Mirrors. A frameless mirror from a home improvement store performs identically to a designer mirror at a fraction of the price. The frame can be added as a DIY project later.
- Backsplash tile in low-moisture zones. In areas that never see direct water contact, budget ceramic tile performs identically to premium porcelain. Save the premium tile budget for the shower floor and walls where moisture resistance actually matters.
- Vanity lighting fixtures. Mid-range vanity lighting from brands like Progress Lighting or Kichler offers comparable aesthetics to designer fixtures at a significant discount. The bulb type (LED) matters more than the fixture brand for long-term energy cost.
The Hidden Cost Most Beginners Discover Too Late
Beyond the line items above, one cost category consistently surprises first-time renovators: the cost of sequence errors. Installing finish tile before a rough-in inspection fails means removing tile to expose the work. Ordering a vanity that arrives damaged and is backordered adds weeks and potentially a second plumber visit. Choosing a shower drain location that conflicts with existing joist direction requires structural modification.
These are not material costs, they are planning costs that show up as material and labor expenses. The best budget protection for a beginner is not finding cheaper tile; it is investing in a detailed plan that surfaces these conflicts before demolition begins.
HomeAdvisor bathroom remodel cost guide provides useful regional labor benchmarks that can help you validate contractor quotes against local market rates before signing anything.
Your Bathroom Renovation Checklist for Beginners
A bathroom renovation checklist for beginners keeps the project moving in the right sequence and prevents the costly mistake of finishing work before rough-in inspections are complete.
- Define design style and create a mood board
- Measure the space and create a scaled floor plan
- Set total budget with a 15-20% contingency reserve
- Determine DIY scope vs. work requiring licensed contractors
- Pull required permits before demolition begins
- Complete demolition and debris removal
- Rough-in plumbing and electrical (inspected before closing walls)
- Install cement board or moisture-resistant drywall in wet areas
- Apply waterproofing membrane in shower and wet zones
- Set tile and allow full cure time before grouting
- Install vanity, undermount sink, and plumbing fixtures
- Install lighting fixtures and connect electrical
- Hang mirrors, install accessories, and complete final caulking
- Final inspection and punch list
Permitting and Regulatory Requirements You Cannot Skip
Permitting is the part of bathroom renovation that beginners most consistently try to skip. This is a mistake that creates real financial and legal risk.
Most jurisdictions require permits for any work that involves moving or adding plumbing, changing electrical circuits, or altering load-bearing elements. Cosmetic work, such as replacing tile, swapping fixtures on existing rough-in, or painting, typically does not require a permit. The line between the two matters.
Unpermitted work can void homeowner’s insurance coverage for related damage, create disclosure obligations when selling the property, and require expensive demolition if discovered during a sale inspection. Check with your local building department before starting any work that touches plumbing or electrical systems. The permit fee is almost always less than the cost of the problem it prevents.
Essential Tools for Bathroom Renovation Every Beginner Needs
Most tool lists for bathroom renovation are written like shopping carts: here are things to buy, good luck. That approach fails beginners because it ignores two decisions that matter more than which brand to choose, when each tool is actually used in the project sequence, and whether buying or renting makes financial sense for a single renovation. This section organizes tools by project phase and gives you a clear rent-vs-buy framework so you’re not spending money on equipment that sits unused after one weekend.
The Rent-vs-Buy Decision Framework
Before listing a single tool, apply this filter to every item:
- Buy if you will use it on multiple future projects, it costs under $75, or renting it repeatedly would exceed the purchase price within two projects.
- Rent if it costs over $200, you will use it for fewer than three days total, or it requires significant storage space.
- Borrow if a neighbor or family member owns it and it’s needed for less than a day (laser levels, for example, are widely owned and easily borrowed).
Applying this framework to a standard beginner bathroom renovation, the tool list splits cleanly into two categories.
Phase 1: Planning and Demolition Tools
These tools are used before a single new material goes in. Most are inexpensive enough to buy and keep.
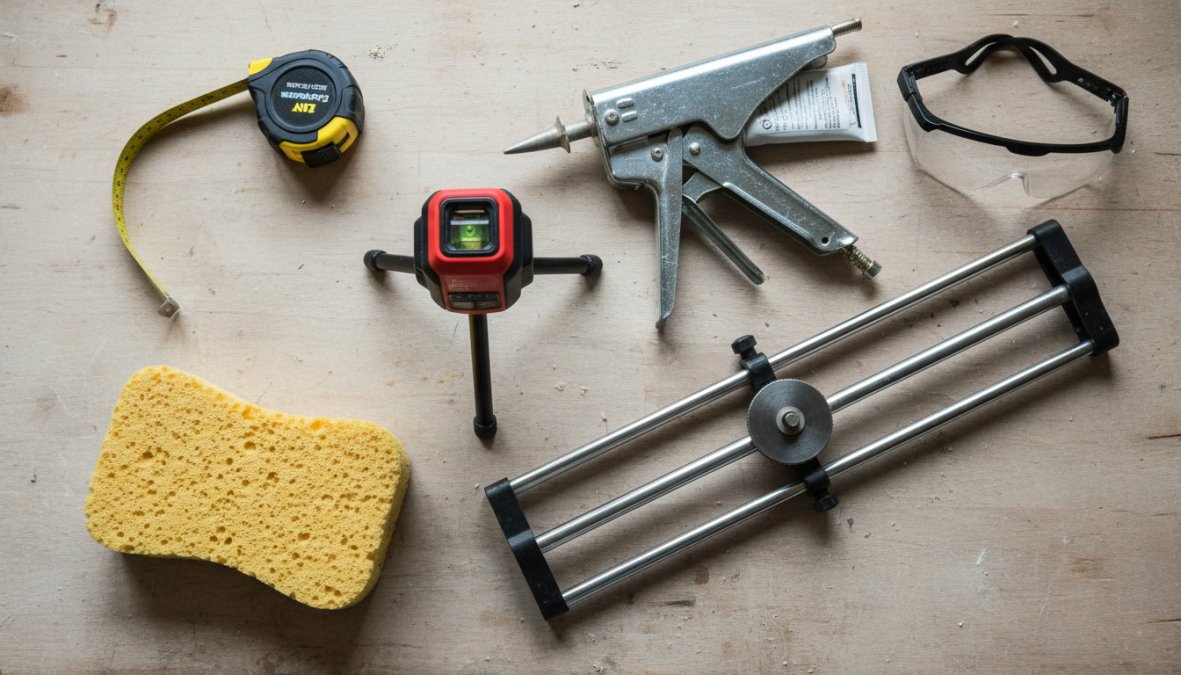
Measuring tape (25-foot, locking): Non-negotiable. Measure every dimension twice before ordering any material. A 25-foot tape handles full-room diagonals for squareness checks. Cost: under $20. Buy.
Stud finder: Required for locating framing before cutting into walls and for anchoring grab bars, medicine cabinets, and wall-mounted vanities securely. A basic magnetic or electronic model handles bathroom walls reliably. Cost: $15-$40. Buy.
Oscillating multi-tool: The single most useful demolition tool for a bathroom renovation. It cuts through caulk, grout, drywall, and old tile backer without the collateral damage a reciprocating saw causes in tight spaces. Brands like Fein (which invented the category) and DeWalt offer reliable models. Blades are sold separately and wear out, budget for extras. Cost: $80-$180 for the tool; $10-$20 per blade set. Buy if you own a home; rent if this is a one-time project.
Pry bar and demolition hammer: For removing old vanities, tile backer, and fixtures. A 24-inch flat pry bar and a 3-pound hand sledge handle most bathroom demolition tasks. Cost: under $40 combined. Buy.
Safety gear: Safety glasses, N95 respirator (tile dust and old drywall compound are respiratory hazards), and work gloves. Non-negotiable and inexpensive. Buy.
Phase 2: Substrate and Waterproofing Tools
These tools are used during the structural phase, installing cement board, applying waterproofing membrane, and preparing the surface for tile.
Utility knife with fresh blades: Cement board scores and snaps cleanly with a sharp utility knife and a straightedge. Dull blades make this task significantly harder. Keep a supply of replacement blades. Cost: under $15. Buy.
Margin trowel and notched trowel: The margin trowel mixes and applies thinset in tight areas. The notched trowel (size depends on tile format, a 1/4"×3/8" V-notch for subway tile, a 1/2" square notch for large-format porcelain) spreads thinset at the correct coverage depth. Buying cheap trowels is a false economy, they flex unevenly and produce inconsistent coverage. Marshalltown and OX Tools make reliable options. Cost: $15-$35 each. Buy.
Liquid waterproofing membrane and application roller: Products like RedGard (Custom Building Products) or Laticrete Hydro Ban are roller-applied directly to cement board before tile installation in wet areas. A standard 9-inch paint roller and tray handle application. The membrane itself is the critical purchase, do not substitute standard paint or primer. Cost of membrane: varies by coverage area. Buy the membrane; use a standard paint roller you likely already own.
When applying liquid waterproofing membrane, apply two coats at 90-degree angles to each other and pay particular attention to inside corners and the transition between the floor and wall. These are the locations where waterproofing failures most commonly originate. Embed fabric mesh tape in the first coat at all corners before the second coat goes on.
Phase 3: Tile Installation Tools
This is where the rent-vs-buy decision has the most financial impact.
Self-leveling laser level: Essential for establishing level reference lines for tile courses, vanity installation, and mirror placement. A self-leveling model (Huepar and Bosch both make reliable options in the $50-$120 range) eliminates the accumulated error that manual bubble levels produce over long runs. Cost: $50-$120. Buy if you plan future tile projects; borrow or rent for a single bathroom.
Wet tile saw: A water-cooled diamond blade saw is required for clean cuts in porcelain tile and stone. This is the highest-cost tool in a tile project and the clearest rent candidate for beginners. A quality wet saw costs $400-$700 to purchase. Rental rates at home improvement stores and tile supply centers typically run $50-$80 per day or $100-$150 for a weekend. For a single bathroom, renting is almost always the right financial decision. Rent.
Tile spacers: Plastic cross-shaped spacers maintain consistent grout joint width during installation. Size depends on your design intent, 1/16" for a near-seamless look, 1/8" for standard subway tile joints, 3/16" or larger for a more rustic appearance. Cost: a few dollars per bag. Buy.
Rubber mallet: Used to set tile into thinset without cracking it. A standard 12-ounce rubber mallet works for most tile formats. Cost: under $15. Buy.
Grout float: A rubber-faced float spreads grout across tile surfaces and packs it into joints. The rubber face conforms to tile surface texture without scratching. Cost: $10-$20. Buy.
Grout sponge (large, purpose-built): A large-cell grout sponge removes grout haze from tile surfaces without pulling grout from joints. Standard household sponges are too small and too dense for this task. Rinse frequently in clean water during cleanup. Cost: under $10. Buy.
Phase 4: Fixture Installation and Finishing Tools
Adjustable wrench and basin wrench: The basin wrench is specifically designed to reach the mounting nuts on faucets inside vanity cabinets, a space where standard wrenches cannot operate. If you are installing a faucet yourself, a basin wrench is not optional. Cost: $20-$35. Buy.
Caulking gun with silicone caulk: Silicone caulk at all transitions, where tile meets the tub, where the vanity meets the wall, where the toilet base meets the floor, is the final moisture barrier. A standard ratchet-drive caulking gun handles standard tubes. Spend the extra few dollars on a smooth-rod gun, which gives better flow control. Cost: $10-$20 for the gun. Buy.
Cordless drill/driver: Used throughout the project for driving screws into cement board, assembling vanity cabinets, and installing accessories. If you own one, it covers this project. If not, a mid-range 18V or 20V drill from DeWalt, Milwaukee, or Ryobi handles everything a bathroom renovation requires. Cost: $80-$180 with battery and charger. Buy, this tool earns its cost across any future home project.
The One Tool Decision That Saves the Most Money
If there is a single tool-related decision that separates a well-managed beginner renovation from an expensive one, it is this: rent the wet tile saw, and invest the savings in an extra bag of thinset and a quality waterproofing membrane. The tile saw is the most expensive tool on this list, the least likely to be reused, and the easiest to rent from any home improvement store or tile supply center. Every dollar saved on the saw purchase is a dollar better spent on the materials that determine whether the renovation lasts five years or twenty.
Organize your tool acquisition by project phase, not by a single pre-project shopping trip. You will not need the grout float on demolition day, and you will not need the pry bar during tile installation. Buying tools as each phase approaches also gives you time to read reviews, compare options, and avoid purchasing something you discover mid-project is the wrong specification for your tile format or substrate type.
How Long Does a Bathroom Renovation Take for Beginners
How long a bathroom renovation takes depends primarily on scope, whether permits are required, and how much of the work is DIY versus contracted.
A realistic beginner renovation timeline looks like this:
| Phase | DIY Timeline | With Contractor |
|---|---|---|
| Planning and design | 1-3 weeks | 1-2 weeks |
| Permitting | 1-4 weeks | 1-3 weeks |
| Demolition | 1-3 days | 1 day |
| Rough-in plumbing/electrical | 2-5 days | 1-2 days |
| Waterproofing and drywall | 2-4 days | 1-2 days |
| Tile installation and cure | 5-10 days | 3-5 days |
| Fixture installation and finishing | 2-4 days | 1-2 days |
| Total | 6-12 weeks | 3-6 weeks |
The renovation timeline expands for beginners primarily because of learning curve time, material delivery delays, and waiting for inspections. Building in a buffer of two to three weeks beyond your estimate is not pessimism; it’s accurate planning.
Tile, Flooring, Vanity, and Fixture Upgrades That Transform Any Bathroom
The right combination of tile, flooring material, vanity, and lighting is what separates a bathroom that looks renovated from one that looks designed. These are the decisions that create the before and after transformation most homeowners are chasing.
Tile and Flooring Materials: Subway Tile, Porcelain, and Beyond
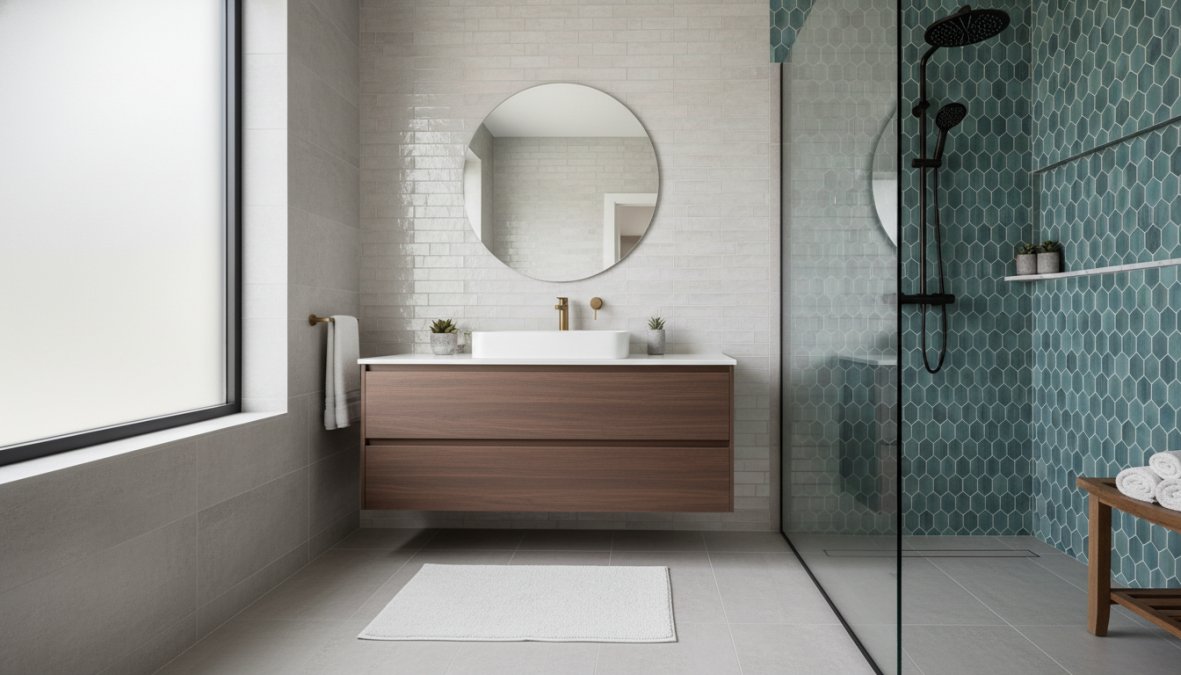
Subway tile remains the most reliable choice for beginners. The 3×6 inch format is forgiving to install, widely available, and works across modern, traditional, and transitional design styles. White subway tile with gray grout is the single most versatile wall treatment in residential bathroom renovation.
Porcelain tile is the preferred flooring material for wet areas. It is denser than ceramic, absorbs less moisture, and holds up better to cleaning chemicals. Large-format porcelain (12×24 or larger) makes small bathrooms read as larger by reducing the number of grout lines, but it requires a flatter substrate and more precise installation.
Marble countertops add visual richness to a vanity but require sealing annually and are vulnerable to etching from acidic products. For beginners, quartz surfaces that mimic marble aesthetics offer similar visual impact with significantly lower maintenance requirements.
For flooring, avoid large-format tile in very small bathrooms with irregular layouts. The cuts become complex and waste multiplies quickly. A 12×12 or 12×24 porcelain in a neutral tone is the practical choice for most beginner projects.
According to the Tile Council of North America installation standards, proper substrate preparation and deflection limits are the leading causes of tile failure in residential installations. Getting the substrate right matters more than the tile itself.
Bathroom Vanity, Storage, and Lighting Design Upgrades
The bathroom vanity is the functional and aesthetic anchor of most bathrooms. Shaker cabinets with an undermount sink and a quartz or marble countertop represent the highest-value upgrade available in most bathroom remodels, combining storage solutions with strong visual impact.
For small bathroom layout solutions, a floating vanity creates the illusion of more floor space and makes cleaning easier. Wall-mounted storage, such as recessed medicine cabinets or open shelving, adds storage without consuming floor area.
Lighting design is consistently underinvested in by beginners. A single overhead fixture produces unflattering shadows for grooming tasks. The correct approach is layered: overhead ambient lighting combined with side-mounted or vertical sconce lighting flanking the mirror. This eliminates the shadow problem entirely.
Faucet hardware finish should match across all fixtures in the bathroom. Mixing chrome and brushed nickel, or matte black and polished brass, produces a visually incoherent result that undermines an otherwise well-executed renovation.
Smart, Eco-Friendly, and Universal Design Features Worth Adding
Here’s where most bathroom renovation guides stop short. The decisions you make now about technology, sustainability, and accessibility determine how well the space serves you in five or ten years, not just today.
Smart Bathroom Technology for Beginners
Smart bathroom technology has become accessible enough for beginners to incorporate without complex installation. The highest-value additions for a first renovation include:
- Smart thermostatic shower valves that allow precise temperature presetting, eliminating the cold-start wait and reducing water waste
- Motion-activated lighting for nighttime safety and energy savings
- Smart exhaust fans with humidity sensors that activate automatically when moisture levels rise, protecting against mold without manual operation
- LED mirror lighting with color temperature control for accurate grooming in both warm and cool light conditions
None of these require advanced electrical knowledge beyond what a licensed electrician would handle during rough-in. The key is specifying them during the planning phase, not trying to add them after walls are closed.
Sustainable Remodeling and Universal Design (Aging in Place)
Sustainable remodeling is not just an aesthetic choice. WaterSense-certified faucets and showerheads, as documented by the EPA WaterSense program, use at least 20% less water than standard fixtures without sacrificing performance. Over the life of the fixtures, the savings are meaningful.
Universal design refers to design that works for people across a range of ages and physical abilities. For bathroom renovation, this means:
- Curbless walk-in shower entries (eliminates a trip hazard and accommodates future mobility needs)
- Grab bar blocking installed in shower and toilet walls during rough-in (blocking costs almost nothing at rough-in; adding it after tile is set costs significantly more)
- Wider doorways (32-36 inches clear) to accommodate future accessibility needs
- Comfort-height toilets and vanities
The argument for incorporating universal design features now is purely economic. Blocking for grab bars during rough-in costs a few dollars in lumber. Retrofitting them into a tiled wall costs hundreds. Building these features in from the start is one of the most overlooked best bathroom renovation tips for beginners.
Best Bathroom Renovation Tips for Beginners: Common Mistakes to Avoid
Most beginner renovation mistakes are not random. They cluster around the same decisions, and knowing them in advance is the fastest way to avoid them.
Mistake 1: Underestimating tile quantities. Order 10-15% more tile than your square footage calculation suggests. Cuts, breakage, and pattern waste consume more material than beginners expect. Running out mid-project and finding the tile is discontinued is a genuine nightmare.
Mistake 2: Skipping the waterproofing membrane. Covered above, but worth repeating. No waterproofing membrane behind a walk-in shower is the most expensive mistake a beginner can make.
Mistake 3: Installing tile over inappropriate substrate. Standard drywall is not suitable for wet areas. Cement board or moisture-resistant backer board is required behind any tile in a shower or tub surround. This is a code requirement in most jurisdictions, not just a best practice.
Mistake 4: Choosing grout color last. Grout color dramatically affects the finished appearance of tile work. Dark grout on white subway tile produces a graphic, contemporary look. White grout on white tile reads as seamless and clean. Make this decision before installation, not after.
Mistake 5: Ignoring ventilation. A bathroom without adequate exhaust ventilation accumulates moisture that damages paint, promotes mold growth, and warps cabinetry. The exhaust fan should be sized to the room volume and vented to the exterior, not into the attic.
Mistake 6: Rushing the cure time. Tile adhesive and grout require full cure time before the shower is used. Walking on freshly set floor tile or running water over uncured grout damages the installation. Follow manufacturer cure time specifications exactly.
The pattern across all six mistakes is the same: beginners prioritize speed and visible progress over the unsexy preparatory work. The renovations that look best at the five-year mark are the ones where the most care went into substrate, waterproofing, and sequence, not the tile selection.
Bathroom renovation is genuinely one of the more complex DIY undertakings a homeowner can attempt, and the gap between a successful project and a costly redo almost always comes down to planning, sequencing, and the quality of work behind the walls. Tony’s Home Improvement LLC brings professional expertise, meticulous attention to detail, and economical material sourcing to both minor updates and full bathroom transformations. If you want the result done right the first time, contact Tony’s Home Improvement LLC to discuss your project and get a clear, honest assessment of what your renovation actually requires.
Frequently Asked Questions
What is the first step in a bathroom renovation for beginners?
The first step in any bathroom renovation is defining your goals and setting a realistic budget. Before buying a single tile or fixture, measure your bathroom layout accurately using a tool like MagicPlan, decide on your design style (modern, transitional, or traditional), and create a priority list. Knowing what you must change versus what would be nice to change helps beginners avoid overspending and scope creep from the very start of the home improvement project.
How much does a basic bathroom renovation cost for beginners?
A basic bathroom remodel budget for beginners typically ranges from $3,000 to $10,000 depending on the scope. A cosmetic refresh, new faucet hardware, a bathroom vanity, fresh paint, and updated lighting, can cost $1,500 to $3,500. A mid-range renovation involving new porcelain tile flooring, a shower enclosure, and plumbing fixtures generally runs $5,000 to $10,000. Labor from a contractor often represents 40-50% of total costs, so DIY updates can significantly reduce spending.
How long does a typical bathroom renovation take?
For beginners, a bathroom renovation timeline depends heavily on scope. A cosmetic DIY update, painting, replacing a vanity, or swapping fixtures, can take one to three weekends. A full gut renovation involving new tile, plumbing fixtures, and a walk-in shower typically takes two to six weeks when hiring a contractor, or longer for a DIYer. Delays from permit approvals, material lead times, or unexpected plumbing issues are common, so always build buffer time into your renovation timeline.
Do I need a permit to renovate my bathroom?
Permits are generally required when your bathroom renovation involves moving or adding plumbing, relocating electrical wiring, or making structural changes. Simple cosmetic updates like replacing a bathroom vanity, swapping a faucet, or retiling a backsplash typically do not require permits. Requirements vary by city and county, so always check with your local building department before starting work. Skipping a required permit can lead to fines and complications when selling your home.
Can I renovate a bathroom myself as a beginner?
Yes, many bathroom renovation tasks are beginner-friendly with the right essential tools and preparation. DIY-appropriate tasks include painting, installing a new bathroom vanity, laying peel-and-stick or click-lock flooring, replacing faucet hardware, and retiling a backsplash. However, tasks involving plumbing rerouting, electrical panel work, or structural changes should be handled by a licensed contractor. A hybrid approach, doing cosmetic work yourself and hiring out technical work, is often the most cost-effective and safest strategy.
What are the most common mistakes beginners make in bathroom remodeling?
The most common beginner mistakes in bathroom renovation include underestimating the budget, skipping required permits, choosing tile or fixtures without checking measurements, neglecting ventilation upgrades, and starting demolition before all materials are on-site. Poor waterproofing around the shower enclosure and tub is another costly error that leads to mold and structural damage. Planning thoroughly, using a bathroom renovation checklist, and consulting a professional for technical questions can help beginners avoid these pitfalls.
This article was written using GrandRanker
 Tony's Home Improvement LLC
Leave a comment