
Table of Contents
- How to Plan a Home Renovation Project Before Anything Else
- Home Renovation Budget Template: How to Set Realistic Numbers
- Home Renovation Checklist for Beginners: Phase by Phase
- Hiring a General Contractor vs. DIY: Making the Right Call
- How Long Does a Home Renovation Take? Realistic Timelines
- Digital Tools, Eco-Friendly Choices, and Stress Management
- Post-Renovation Maintenance Plan: Protecting Your Investment
- How to Plan Your Home Renovation Project in Norwalk, CT
- Conclusion
Last Updated: May 31, 2026
Knowing how to plan home renovation project work correctly before breaking a single wall is the difference between a smooth build and a costly disaster. Tony’s Home Improvement LLC has helped homeowners across Norwalk, CT transform properties of every size, and the pattern is consistent: projects that start with a clear plan finish on time, on budget, and without regret. Below, we’ll show you exactly how to structure your renovation from the first conversation to the final coat of paint, covering budget templates, contractor vetting, permits, digital tools, and the stress management strategies most guides completely ignore.
Most homeowners skip at least two of those steps. That’s where the trouble starts.
How to Plan a Home Renovation Project Before Anything Else
The single most common reason renovation projects go sideways is scope creep: the gradual expansion of work beyond what was originally agreed upon. Before you call a contractor or browse floor plan ideas, you need to define exactly what you want done, why you want it done, and what you’ll do if costs run over.
Defining Your Scope of Work: Needs vs. Wants
Start by separating structural needs from cosmetic wants. Needs are non-negotiable: a failing HVAC system, outdated electrical wiring, plumbing that doesn’t meet current building codes, or structural remodeling required for safety. Wants are upgrades that improve comfort or resale value but aren’t urgent: new fixtures, expanded square footage, or a redesigned floor plan.
Write both lists down. Then rank the wants by how much value they add, both to your daily life and to the home’s resale value. This exercise alone prevents the most common budgeting mistake: treating cosmetic changes as if they carry the same urgency as structural repairs.
Skipping the needs-vs-wants exercise almost always leads to budget exhaustion before the critical work is done. Homeowners who spend heavily on finishings before addressing plumbing or electrical issues often face a second round of costly repairs within three to five years.
Understanding Building Codes and Permit Requirements
Building codes exist to protect occupants, and ignoring them is one of the most expensive mistakes a homeowner can make. In Connecticut, most structural remodeling, electrical work, plumbing changes, and HVAC modifications require permits from the local building department. Norwalk has its own permitting office with specific requirements for residential projects.
Obtaining permits before work begins protects you legally and ensures inspections happen at key milestones: framing, rough electrical, rough plumbing, and final inspection. Unpermitted work can block a home sale, trigger fines, or require demolition and rebuilding at your expense.
According to the National Association of Home Builders’ guidance on permits and codes, skipping the permit process is one of the top reasons homeowners face legal complications during property sales.
A good contractor will pull permits on your behalf. If a contractor tells you permits aren’t necessary for work that clearly requires them, that’s a red flag worth acting on immediately.
Home Renovation Budget Template: How to Set Realistic Numbers
Here’s what most renovation budget guides get wrong: they tell you to get three quotes and pick the middle one. That’s not a budget strategy. A real renovation budget template accounts for every cost category before a single quote arrives, and it forces you to make explicit trade-off decisions rather than discovering them mid-project when your options have narrowed.
Use this framework as your starting point:
| Cost Category | Estimated % of Total Budget | Notes |
|---|---|---|
| Materials | 40-50% | Varies sharply by finish level; mid-grade vs. luxury tile can swing this 10 points alone |
| Labor | 30-40% | Higher for structural, plumbing, and electrical; lower for cosmetic-only work |
| Permits and fees | 2-5% | Required by Norwalk building dept.; factor in inspection fees, not just application fees |
| Design and planning | 5-10% | Architect or designer fees; skipping this often costs more in rework |
| Contingency reserve | 10-20% | Non-negotiable buffer, see below |
The contingency reserve is the line item homeowners most often cut. Don’t. Renovation projects, particularly those involving older homes, routinely surface hidden problems: outdated wiring behind walls, substandard framing, or plumbing that doesn’t match the plans. Without a buffer, every surprise becomes a crisis that forces you to make bad decisions under financial pressure.
The Three-Tier Budget Method: Good, Better, Best
Rather than building a single budget number, experienced project managers build three versions before soliciting bids:
- Floor budget (Good): What the project costs with mid-grade materials, no scope additions, and a 10% contingency. This is your walk-away number, the point at which you pause the project rather than go further into debt.
- Target budget (Better): Your realistic expectation with the finishes you actually want and a 15% contingency. This is what you present to contractors.
- Ceiling budget (Best): The absolute maximum you can spend, including a 20% contingency and one meaningful upgrade. This number stays private.
Having all three numbers before the first contractor conversation changes the dynamic entirely. You’re negotiating from a position of clarity rather than reacting to quotes you don’t have context for.
Budgeting for HVAC, Plumbing, and Electrical Work
These three systems are where renovation budgets most frequently collapse. HVAC, plumbing, and electrical work require licensed subcontractors, and their costs depend heavily on the age of your home and the complexity of the changes.
Older homes in the Norwalk area often have knob-and-tube wiring or galvanized plumbing that must be replaced before new work can be added. Discovering this during demolition, rather than during planning, adds both time and cost to the construction timeline.
The practical approach: hire a licensed inspector to assess all three systems before finalizing your budget. The inspection cost is small relative to the information it provides. Specifically, ask the inspector to note the age and condition of the electrical panel, the material and condition of supply and drain lines, and the age and efficiency rating of the HVAC equipment. Each of those answers changes your contingency calculation.
How to Cut Costs Without Cutting Corners
Cost reduction in renovation falls into two categories: smart substitutions and scope reductions. Confusing them is where homeowners get into trouble.
Smart substitutions preserve function and safety while reducing spend:
- Choose stock cabinet sizes over custom dimensions; the price difference is substantial and the visual result is nearly identical with quality hardware
- Use large-format porcelain tile instead of natural stone in wet areas; it performs comparably and costs significantly less to install because there are fewer grout lines
- Source appliances during holiday sales cycles (Labor Day, Black Friday, and post-New Year clearance are the most reliable windows)
- Ask your contractor about material overstock; suppliers regularly sell discontinued or excess inventory at meaningful discounts
Scope reductions that don’t compromise the project:
- Phase cosmetic upgrades into a second project rather than doing everything at once
- Keep plumbing fixtures in their existing locations wherever possible; moving drain lines is one of the most expensive single decisions in a bathroom or kitchen remodel
- Refinish rather than replace where the substrate is sound: hardwood floors, solid-wood cabinet boxes, and cast-iron tubs are all candidates
The line you should not cross:
Never reduce the contingency reserve, never skip permits to save on fees, and never substitute materials in structural, electrical, or plumbing applications to hit a price point. These are the decisions that generate the horror-story renovations. The savings are real in the short term; the liability is larger.
How Home Equity and Resale Value Factor Into Your Budget
Home equity is the portion of your home’s value that you own outright, and it’s one of the most common financing sources for renovation projects. Home equity loans and lines of credit typically offer lower interest rates than personal loans, making them a practical option for larger remodels.
Before borrowing against equity, run the numbers on resale value. Not every renovation returns its cost at sale. According to Remodeling Magazine’s annual Cost vs. Value report, kitchen and bathroom updates tend to recover a meaningful portion of their cost at resale in the Northeast market, while high-end additions and luxury finishes often return less than their investment. The report is published annually and includes regional data, which matters because return rates in Fairfield County differ from national averages.
The goal isn’t to renovate purely for resale. But understanding which improvements add durable value helps you prioritize when the budget is tight, and it prevents the common mistake of over-improving relative to the neighborhood, where the market simply won’t support the investment regardless of quality.
If you are financing through a home equity line of credit, build your repayment plan before the project starts, not after. Renovation projects have a way of consuming available credit faster than expected, and a variable-rate HELOC in a rising-rate environment can change your monthly obligation significantly over a multi-month project.
The most important number in your renovation budget isn’t the total, it’s the contingency reserve. Every experienced contractor and project manager will tell you the same thing: the projects that stay on budget are the ones where the homeowner treated the contingency as spent money from day one, not as a safety net they hoped not to touch.
Home Renovation Checklist for Beginners: Phase by Phase
A home renovation checklist for beginners needs to be sequential, not just comprehensive. The order of operations matters as much as the tasks themselves. Work done out of sequence creates rework, which costs time and money.
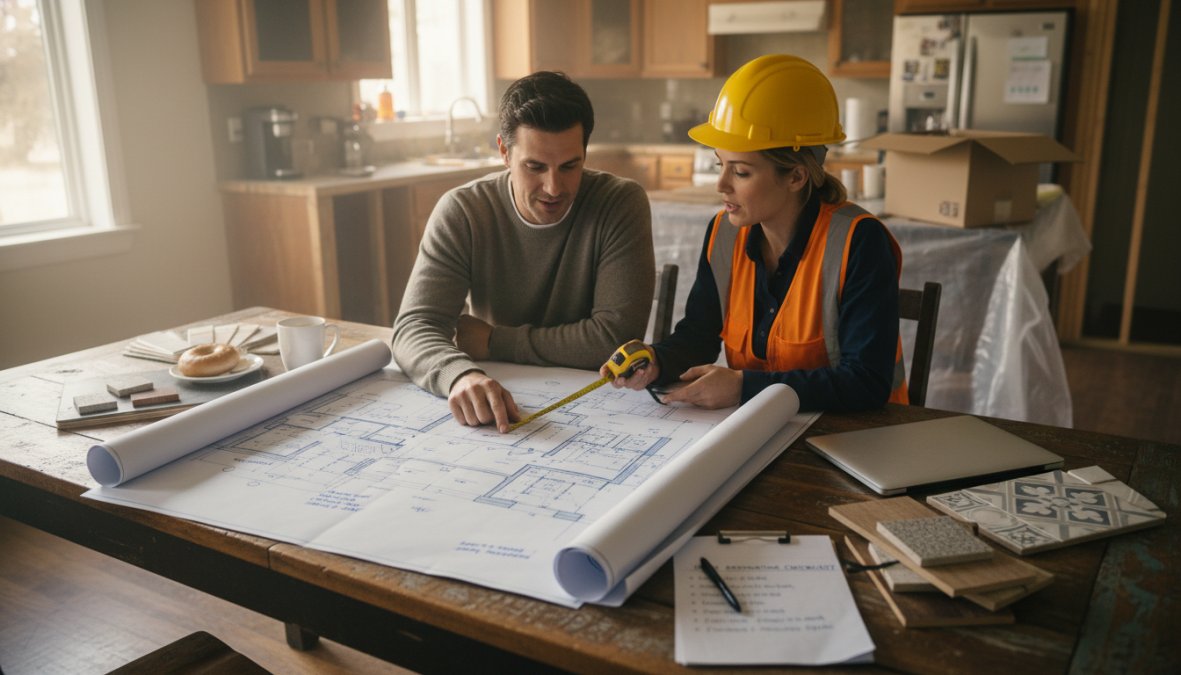
Here is the core phase-by-phase sequence:
- Define scope of work (needs vs. wants list)
- Set total budget with contingency reserve
- Consult a licensed inspector for HVAC, plumbing, and electrical assessment
- Finalize design and floor plan with architect or designer
- Submit permit applications to Norwalk building department
- Select and contract general contractor or subcontractors
- Order long-lead materials (cabinets, fixtures, specialty items)
- Complete demolition and structural framing
- Rough-in HVAC, plumbing, and electrical
- Pass rough inspections before closing walls
- Install insulation, drywall, and finishings
- Final inspections and certificate of occupancy
- Punch list and project closeout
Design and Planning Phase: Floor Plans and Traffic Patterns
The design phase is where decisions are cheapest. Changes made on paper cost nothing. Changes made after framing cost significantly more.
Floor plan design should account for traffic patterns, the natural movement of people through a space. A kitchen remodel that positions the refrigerator, sink, and range in a logical triangle improves daily usability far more than expensive finishings. A bathroom addition that ignores door swing and fixture clearance creates frustration every single day.
Work with a designer or architect who asks how you actually use the space, not just what you want it to look like. That distinction separates functional renovations from beautiful ones that don’t work.
Demolition and Framing: What to Expect
Demolition is the most psychologically satisfying and practically dangerous phase of any remodel. Walls come down quickly. What’s behind them takes longer to resolve.
Prep work before demolition matters: utilities must be shut off to affected areas, hazardous materials like asbestos or lead paint must be assessed and handled by licensed professionals, and the sequence of removal must protect structural integrity. In Norwalk’s older housing stock, this step frequently surfaces surprises.
Framing follows demolition and establishes the physical structure of your new space. This is the phase where your floor plan becomes three-dimensional. Get your framing inspection completed before any walls are closed, because fixing problems at this stage costs a fraction of what they cost later.
Order windows, doors, and specialty fixtures before demolition begins. Lead times on custom items can run six to twelve weeks, and a delayed delivery can stall your entire construction timeline.
Hiring a General Contractor vs. DIY: Making the Right Call
The DIY vs. contractor decision depends on three factors: the scope of work, your actual skill level, and your local permit requirements. Most homeowners overestimate the first two and underestimate the third.
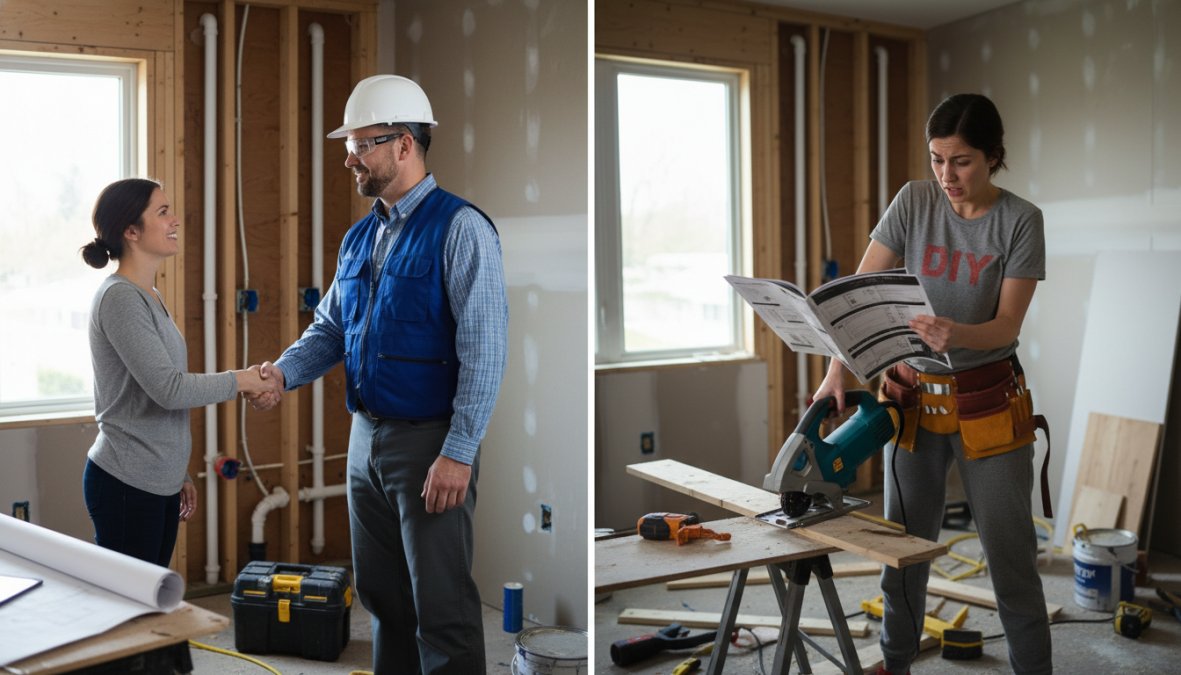
Cosmetic changes, painting, basic tile work, fixture swaps, are genuinely DIY-friendly for homeowners with patience and the right tools. Structural remodeling, electrical panel work, HVAC installation, and anything requiring a permit is a different matter. Connecticut requires licensed contractors for most of this work, and attempting it without licensure creates both safety and legal liability that follows the property, not just the person who did the work.
A general contractor coordinates subcontractors, manages the construction timeline, and takes responsibility for the overall scope of work. For complex projects, that coordination function alone is worth the cost. What the contractor is really selling you isn’t labor, it’s sequencing, accountability, and the relationships with licensed subcontractors that took years to build.
The Honest DIY Audit
Before deciding to self-manage any portion of a renovation, answer these questions honestly:
- Have you completed a project of similar complexity before, or are you estimating based on watching it done?
- Do you have the specific tools required, or will you be renting or improvising?
- Can you absorb a two-to-four-week delay if your work fails inspection and must be redone?
- Is your time genuinely free, or are you trading paid work hours for renovation hours at a net loss?
The hidden cost of DIY on permitted work is the inspection failure rate for first-time homeowners attempting systems work. A failed rough electrical or plumbing inspection doesn’t just cost the re-inspection fee, it costs the delay while licensed work is brought in to correct it, which can stall every trade behind it in the schedule.
How to Vet Contractors and Avoid the Low Bid Trap
The low bid trap is real, and it costs Connecticut homeowners significantly every year. A contractor who bids substantially below the others is either missing scope, planning to use inferior materials, or intending to make up the difference through change orders once work has begun and you have no practical exit.
Vet every contractor on these criteria before signing anything:
- Valid Connecticut contractor license: Verify through the Connecticut Department of Consumer Protection’s online license lookup. This takes two minutes and is non-negotiable.
- Current general liability and workers’ compensation insurance: Ask for a certificate of insurance naming you as an additional insured. A contractor who hesitates on this request is telling you something important.
- At least three verifiable local references from projects similar in scope: Call them. Ask specifically: Did the project finish within 10% of the original budget? Did the contractor communicate proactively when problems arose? Would you hire them again without hesitation?
- A written contract that specifies scope of work, materials by brand and model number where possible, payment schedule tied to milestones, and timeline with defined phases: A contract that says "kitchen remodel" without specifying cabinet brand, countertop material, and fixture allowances is not a contract, it’s an invitation to disputes.
- Clear documentation of who pulls permits and manages inspections: The answer should always be the contractor. If they suggest you pull your own permits to save money, understand that you are then legally the contractor of record and assume all liability.
Get at least three bids. Compare them line by line, not just by total. A bid that’s missing a line item isn’t cheaper, it’s incomplete, and the missing cost will appear later as a change order.
Change orders are the primary mechanism through which low bids become high final costs. Before signing any contract, ask each bidding contractor to walk you through every scenario that would generate a change order on your specific project. A contractor who can articulate those scenarios clearly is one who has thought through your project. A contractor who says “we’ll cross that bridge when we come to it” is one who will be presenting you with change orders.
The Contractor Relationship Is a Working Relationship, Treat It Like One
This is the part of contractor selection that almost no renovation guide addresses, and it may be the most practically important.
You will spend weeks or months in close contact with your contractor and their crew. The quality of that working relationship directly affects the quality of the finished project. Contractors do their best work for clients who are organized, decisive, and respectful, and they find ways to cut corners, consciously or not, when a client relationship is adversarial or chaotic.
Before you sign a contract, pay attention to these behavioral signals during the bidding process:
- Response time: A contractor who takes four days to return a call during the bidding phase, when they’re trying to win your business, will not become more responsive once they have your deposit.
- How they handle your questions: A contractor who becomes defensive when you ask for clarification on a line item is showing you how they’ll handle disagreements during the project.
- Whether they ask questions about how you use the space: A contractor who only talks about what they’ll build, without asking how you live, is optimizing for their process rather than your outcome.
- Their subcontractor relationships: Ask who does their electrical and plumbing work, and whether those subcontractors are employees or independent. Contractors with stable, long-term subcontractor relationships produce more consistent results than those who hire whoever is available.
The best contractor for your project is rarely the cheapest and rarely the most expensive. The right contractor clearly explains their process, responds promptly, provides references without hesitation, and treats the bidding conversation as a collaboration rather than a sales pitch.
Managing the Contractor Relationship During Construction
Once work begins, the homeowner’s job shifts from selection to management, and most homeowners aren’t prepared for what that actually requires.
Establish these ground rules before the first day of work:
- Single point of contact: Designate one person in your household to communicate with the contractor. Mixed messages from multiple family members create confusion and, eventually, conflict.
- Weekly progress meetings: Schedule a standing 30-minute meeting each week to review completed work, upcoming decisions, and any emerging issues. This prevents the accumulation of small misunderstandings into large disputes.
- Decision deadlines: For every pending decision, tile selection, fixture choice, paint color, agree on a deadline. Delayed decisions are one of the top causes of project timeline extension, and the delay cost is real even when it isn’t billed as one.
- Change order protocol: Agree in writing that no scope change will proceed without a signed change order specifying the additional cost and timeline impact. Verbal agreements about changes are the source of the majority of contractor disputes.
The homeowners who finish renovations on time, on budget, and with their contractor relationships intact are almost always the ones who treated the contractor relationship as a professional partnership from day one, with clear expectations, documented agreements, and consistent communication. The logistics of construction are manageable. The relationship dynamics are where projects actually succeed or fail.
Tony’s Home Improvement LLC brings exactly this standard to renovation projects in Norwalk and the surrounding area: meticulous attention to detail, economical sourcing of materials, and clear communication at every stage of the project.
How Long Does a Home Renovation Take? Realistic Timelines
How long a home renovation takes depends on scope, permit processing time, material lead times, and contractor availability. Most homeowners underestimate all four.
A cosmetic kitchen refresh with no structural changes might take three to six weeks. A full kitchen remodel with layout changes, new plumbing, and electrical upgrades typically runs three to five months. A whole-home renovation involving structural remodeling can take six months to over a year.
Permit processing in Norwalk, CT adds time that many homeowners don’t account for. Applications must be submitted, reviewed, and approved before work can legally begin on most structural and systems work. Build two to four weeks of permit processing time into your construction timeline as a baseline.
The most reliable way to get an accurate timeline is to ask your contractor for a written schedule broken down by phase, with dependencies noted. If they can’t produce one, that’s information worth having before you sign a contract.
According to the U.S. Census Bureau’s Survey of Construction data on renovation timelines, renovation timelines vary significantly by project type and region, with permit processing being one of the most commonly underestimated variables.
Digital Tools, Eco-Friendly Choices, and Stress Management
This is the section most renovation guides skip entirely. That’s a mistake, because the tools you use to manage a project and the decisions you make about materials have lasting consequences, and the psychological toll of a major remodel is real.
Apps and Digital Tools for Project Management
Managing a home renovation project without dedicated tools means relying on email threads, text messages, and paper notes, all of which fragment information and create miscommunication.
Several project management platforms work well for homeowners coordinating with contractors:
- Houzz Pro: Designed specifically for home renovation, with mood boards, contractor communication, and budget tracking in one place
- Buildertrend: Used by many professional contractors, it allows homeowners to track progress, approve change orders, and view schedules
- Notion or Trello: General project management tools that work well for homeowners who want to build a custom renovation tracker
- Google Sheets: Underrated for budget tracking; a shared spreadsheet gives both homeowner and contractor real-time visibility into costs
The best digital tool is the one your contractor will actually use. Before the project starts, agree on a single communication and documentation platform. Fragmented communication is the root cause of most contractor disputes.
Sustainable and Energy-Efficient Renovation Options
Eco-friendly renovation choices are no longer a premium niche. They’re increasingly cost-competitive, and in Connecticut, several incentive programs make them financially attractive.
Energy efficiency upgrades worth prioritizing:
- Insulation upgrades: Improving wall and attic insulation reduces HVAC load and lowers utility costs year-round
- Energy-efficient windows: Particularly relevant in Norwalk’s climate, where heating costs are significant
- Low-VOC materials: Paints, adhesives, and finishings with low volatile organic compounds improve indoor air quality
- LED lighting throughout: Lower energy consumption with longer fixture lifespan
- High-efficiency HVAC systems: Modern systems use significantly less energy than units installed more than fifteen years ago
According to ENERGY STAR’s home improvement guidance for homeowners, energy-efficient upgrades can reduce home energy costs meaningfully while also improving comfort and indoor air quality.
The sustainable renovation approach isn’t just about environmental responsibility. It’s about building a home that costs less to operate over time.
Protecting Your Mental Health During a Remodel
Nobody talks about this enough. A home renovation is one of the most stressful experiences a family can go through. Living in a construction zone, managing contractor relationships, making hundreds of decisions, and watching your budget fluctuate creates genuine psychological strain.
Practical strategies that actually help:
- Establish a decision-free zone: Designate one room that stays completely off-limits to renovation activity. Having a space that feels normal matters more than it sounds.
- Set a weekly check-in cadence: Rather than fielding contractor questions throughout the day, schedule a single weekly meeting to review progress and address issues. This reduces decision fatigue significantly.
- Acknowledge the timeline will shift: Projects almost always take longer than planned. Accepting this before it happens reduces the emotional impact when it does.
- Communicate with your household: The stress of renovation affects everyone living in the home. Regular, honest conversations about progress and frustrations prevent resentment from building.
The homeowners who come out of major renovations with their relationships and sanity intact are the ones who planned for the psychological reality of the process, not just the construction logistics.
Post-Renovation Maintenance Plan: Protecting Your Investment
Most homeowners treat project completion as the finish line. It isn’t. A renovation without a maintenance plan is an investment that depreciates faster than it should.
Within the first thirty days after project completion, document everything: take photos of all systems, collect warranties for all installed equipment and fixtures, and file your permit completion paperwork. Create a home maintenance folder, physical or digital, that contains contractor contact information, warranty documents, and equipment manuals.
Build a recurring maintenance schedule around your new systems:
- HVAC filters: check monthly, replace every one to three months depending on system specifications
- New plumbing fixtures: inspect for leaks at the six-month mark
- Painted surfaces: touch up annually to prevent moisture infiltration
- Grout and caulk in bathrooms and kitchens: inspect annually, reseal as needed
- Any structural additions: visual inspection annually for settling or movement
The maintenance plan is also the document that protects your resale value. Buyers and their inspectors look for evidence that a home has been cared for. A well-maintained renovation commands a stronger price than one that’s been neglected.
How to Plan Your Home Renovation Project in Norwalk, CT
Planning a home renovation project near Norwalk comes with specific local considerations that generic guides don’t address. Connecticut’s climate, with cold winters and humid summers, makes insulation, moisture management, and HVAC sizing particularly important. Norwalk’s older housing stock, with many homes built before 1980, means permit requirements and code compliance are more complex than in newer construction.
The Norwalk building department processes permits for all structural, electrical, plumbing, and HVAC work. Timelines vary by project complexity, and pre-application consultations are available for larger projects. Knowing this before you start prevents scheduling surprises.
Local contractor availability in Fairfield County is competitive, particularly for projects starting in spring and summer. If you’re planning a renovation that begins in May or June, start your contractor search in January or February. The best contractors in the area book out months in advance.
Tony’s Home Improvement LLC serves homeowners throughout Norwalk and the surrounding CT region, handling everything from kitchen and bathroom remodels to complex structural work. The firm’s approach to cost-effective material sourcing and professional project management makes it a practical choice for homeowners who want high-quality results without the overhead of larger firms. If you’re searching for a reliable renovation contractor near me in the Norwalk area, the combination of local knowledge and meticulous craftsmanship matters.
Home renovation planning is genuinely hard work, and the stakes are high. A well-planned project protects your budget, your timeline, and your home’s long-term value. Tony’s Home Improvement LLC brings professional expertise, meticulous attention to detail, and efficient project execution to every job, whether it’s a targeted bathroom update or a full structural remodel. Contact Tony’s Home Improvement LLC to discuss your project scope and get a clear, honest assessment of what your renovation will take.
Frequently Asked Questions
What is the first step in planning a home renovation project?
The first step in planning a home renovation project is defining your scope of work, separating what you need from what you want. Before contacting a contractor or setting a budget, walk through your space and list every change you'd like to make. Then prioritize those items by necessity and impact. This prevents scope creep later and gives any contractor a clear picture of the project from the start.
How do I create a realistic home renovation budget?
Start by getting at least three itemized quotes from licensed contractors so you can compare labor and materials costs. Build in a contingency fund of 10-20% for surprises like hidden plumbing or electrical issues. Factor in permit fees, subcontractor costs, and finishings. Using a home renovation budget template with separate line items for HVAC, plumbing, electrical, and cosmetic changes helps you track spending and avoid going over budget.
How long does a home renovation take from planning to completion?
How long a home renovation takes depends heavily on the project scope. A cosmetic update like new fixtures and paint can take a few days to a couple of weeks. A kitchen or bathroom remodel typically runs 4-10 weeks. A full structural remodeling project involving framing, HVAC, plumbing, and electrical can take 3-6 months or longer. Always add buffer time to your construction timeline for permit approvals and material delays.
Should I hire a general contractor or do my home renovation myself?
For complex projects involving structural remodeling, electrical, or plumbing work, hiring a licensed general contractor is strongly recommended. DIY is reasonable for cosmetic changes like painting, tiling, or installing fixtures if you have the skills and time. A contractor manages subcontractors, handles building permits, and ensures work meets building codes, reducing risk significantly. For homeowners in Norwalk, CT, working with a local contractor also means familiarity with regional code requirements.
What are the most common mistakes homeowners make when planning a renovation?
The most common mistakes include underestimating the renovation budget, skipping the permit process, choosing a contractor based on the lowest bid alone, and failing to define the scope of work before construction begins. Homeowners also frequently overlook traffic patterns and layout flow during the design phase, which leads to costly changes mid-project. Building a detailed renovation checklist before any demolition starts helps avoid these pitfalls.
This article was written using GrandRanker
 Tony's Home Improvement LLC
Leave a comment